HTML – Introduction
HTML stands for Hypertext Markup Language. It is the standard language used to create web pages. It is the most widely used language to design web pages. HTML is the basic building block of the web. It is used for defining the structure of the content of a web page.
HTML is essential for web development, as it forms the backbone of web content and is often used in conjunction with CSS (Cascading Style Sheets) and JavaScript to create fully functional and styled web applications.
Features of HTML
Elements and Tags: HTML is composed of elements, which are defined by tags. For example, <p> is a tag that defines a paragraph, and <h1> defines a top-level heading.
Attributes: HTML elements can have attributes that provide additional information about the element. For example, the <a> tag (anchor tag) can have an href attribute that specifies the URL of the link.
Structure: HTML documents have a hierarchical structure, typically starting with a <!DOCTYPE html> declaration, followed by the <html>, <head>, and <body> tags. The <head> contains information about the document, while the <body> contains the content that is displayed to users.
Hyperlinks: HTML allows the creation of hyperlinks, enabling users to navigate from one page to another.
Multimedia: HTML supports the embedding of images, audio, and video, allowing for rich multimedia content on web pages.
Advantages of HTML
HTML offers several advantages that contribute to its widespread use in web development. Here are the main advantages of HTML:
Easy to Learn and use: HTML is a beginner-friendly language. Its syntax is very simple with plain English-like tags. Beginners can quickly understand and build web pages.
Platform Independence: HTML code is platform-independent, meaning it can be created and viewed on various operating systems and devices without compatibility issues. HTML files can run on any operating system (Windows, Mac, Linux, Android, iOS).
Compatibility: HTML is highly compatible with other technologies and languages commonly used in web development, such as CSS (Cascading Style Sheets) for styling and JavaScript for interactivity. This compatibility enables developers to create rich, dynamic web experiences.
Hyperlinking: HTML enables the creation of hyperlinks, allowing users to navigate between different web pages and resources seamlessly. This interconnectivity is a fundamental aspect of the web.
Multimedia Support: HTML supports the embedding of images, audio, and video, enabling rich multimedia experiences on web pages.
Disadvantages of HTML
While HTML has many advantages, it also has some disadvantages and limitations. Here are the main disadvantages of HTML:
Static Nature: HTML alone creates static web pages. To make pages dynamic and interactive, we need CSS, JavaScript etc. languages.
Limited Functionality: HTML alone cannot perform complex tasks or calculations. For interactive features, developers must rely on JavaScript or other programming languages, which can complicate development.
Limited Styling Options: HTML by itself has very basic styling (fonts, colors, alignment). For proper design, we must use CSS.
Browser Compatibility Issues: While HTML is generally supported across browsers, there can still be inconsistencies in how different browsers render HTML elements, especially with older versions or less common browsers. Some tags or features may not work the same way in all browsers.
Dependency on Other Technologies: To create fully functional web applications, HTML must be used in conjunction with other technologies like CSS and JavaScript. This can increase the learning curve for new developers.
HTML – Tags
HTML tags are the fundamental components used to structure and format content on web pages. They provide instructions to web browsers on how to display various elements, such as text, images, links, and other media. Tags are commands enclosed in angle brackets (e.g., <p> for a paragraph) to mark-up content. HTML (HyperText Markup Language) uses tags to define elements within a web page.
Notes: HTML tags are not case sensitive.
Types of HTML Tags:
There are two kinds of tags:
- Paired (Container) Tags
- Unpaired (Empty) Tags
Paired (Container) Tags:
Most HTML tags come in pairs: an opening tag and a closing tag like <HTML> and </HTML>. Such types of tags are called Paired or Container Tags. The closing tag is identical to the opening tag but includes a forward slash before the tag name (e.g., <p> and </p>).
Format of Paired Tag
<tagname> Content </tagname>
Example
<h1>Hello</h1>
<p>Paragraph text</p>
Unpaired (Empty) Tags:
An unpaired or empty tag refers to a tag, which does not have an ending (closing) tag.
Format of Unpaired Tag:
<tagname>
Example:
<br>
<img src=”D:\Pictures\flower.jpg”>
<hr>
Elements and Attributes
In HTML, elements and attributes are fundamental concepts that define the structure and behavior of web pages. Understanding HTML elements and attributes is crucial for creating well-structured and functional web pages. Elements define the content and layout, while attributes provide additional information and control over the behavior and appearance of those elements. Here’s a detailed explanation of both:
HTML – Elements
An HTML element is a component of a web page defined by a start tag, content, and an end tag such as headings, paragraphs, and images. An element is everything between the opening tag and closing tag (including the content).
Structure of an HTML Element
An HTML element typically consists of:
Start Tag: The opening tag that defines the element, e.g., <p>.
Content: The text or other elements contained within the element, e.g., This is a paragraph.
End Tag: The closing tag that indicates the end of the element, e.g., </p>.
Example of Elements
Paragraph Element
<p>This is a paragraph. </p>
Heading Element
<h1>Hello World</h1>
Image Element
<img src=”D:\Pictures\cat.jpg”>
HTML – Attributes
Attributes are properties that provide additional information about elements. An attribute is used to define the characteristics of an element and is always placed inside the element’s opening tag. Attribute allows us to specify how web browsers should treat a particular tag.
Attributes are important part of HTML elements. They usually come in name/value pairs, separated by an equals sign. Attributes can modify the behavior or appearance of an element.
Example of Attributes
<img src=”D:\Pictures\flower.jpg”>
Here, src is attribute, src specifies the source URL for an image in an <img> tag.
Creating HTML Document
Creating an HTML document is a very easy process. To create and view an HTML document, we generally need the following software tools:
- Text Editor
- Web Browser
Text Editor
A text editor is used to write or edit HTML code. We can use a simple text editor such as Notepad. We can also use professional or advanced code editors such as Notepad++, Visual Studio Code, or Adobe Dreamweaver.
Web Browser
A web browser is used to read HTML documents and display them as web pages. Examples include Google Chrome, Mozilla Firefox, Microsoft Edge, and Safari. The browser does not normally display the HTML tags to the user. Instead, it interprets the tags and uses them to determine how the content should be presented on the webpage.
Steps to Create a HTML Document in VS Code
To use HTML in Visual Studio Code, we need to create a project folder and make an HTML file.
Step 1: Set Up Project Folder
- Open Visual Studio Code.
- Click File > Open Folder in the top menu.
- Select your folder or create a new folder and select it.
Step 2: Create an HTML File
- Hover over your folder name in the left Explorer sidebar and click the New File icon (or press Ctrl + N).
- Name the file with .html extension and press Enter.
Step 3: Write HTML Code and save the file by pressing Ctrl+S
Step 4: Run Your HTML File
- Right click the file and select Copy Path.
- Paste that path directly into the address bar of any web browser. (Refresh the browser page every time you save changes to your code)
OR
Step 1: Open Visual Studio Code (VS Code).
Step 2: Create a New File
Go to File → New Text File or press Ctrl + N.
Step 3: Save the file with .html extension, e.g., index.html.
Step 4: Write the HTML code.
Step 5: Save the file using Ctrl + S.
Step 6: Open the HTML file in a web browser to view the webpage. Go to the folder where we saved the file and double-click the file. It will open in default web browser.
Structure of HTML Document
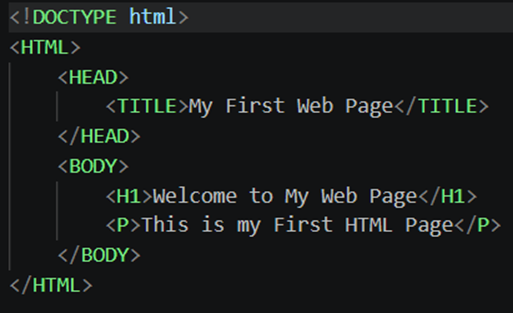
A basic HTML document has a standard structure that tells the web browser how to display the webpage.
Explanation of the Structure
<!DOCTYPE html> is called the DOCTYPE declaration. This is a mandatory declaration that tells the browser the file is an HTML5 document.
- It must be the first line of an HTML document.
- It is not an HTML tag. It is a Document Type Declaration (DTD).
- It helps the browser display the webpage using the correct HTML standards. Omitting it forces browsers into “quirks mode,” causing styling inaccuracies.
- It is case-insensitive, meaning <!doctype html> works exactly same as <!DOCTYPE HTML>
<HTML>
The <HTML> tag defines the top-most element, identifying it as an HTML document. It is a container tag that has a start and an end tag and all the other tags nested within it. The <HTML> tag is the main container or containing element for the whole HTML document. It represents the root of an HTML document. It simply tells the browser that this is an HTML document. Each HTML document should have one <HTML> tag and each document should end with a closing </HTML>tag.
<HEAD>
The <HEAD> tag contains general information about the HTML file. The <HEAD> tag is nested within the HTML tag. Usually, the only tag contained within the head tag is the title tag. Other tags also can be contained within the <HEAD> tag but they are used less often.
- Contains information about the document that is not displayed on the webpage.
- Includes elements such as:
- <title> – Sets the title shown in the browser tab.
- <meta> – Provides metadata like character encoding and viewport settings.
- <link> – Links external CSS files.
- <script> – Includes JavaScript files.
<TITLE>
The <TITLE> tag is used to set a title for every HTML document. It represents the document’s title or name. The <TITLE> tag defines a title in the browser’s title bar. It is always good to use titles that identify the document. <TITLE> tag is nested within the <HEAD> tag. It identifies our page to the rest of the world. The tag output is displayed on web browsers title bar but does not appear as part of the page.
<BODY>
The <BODY> tag appears after the <HEAD> tag. It simply defines the document’s body. The <BODY> tag contains the web pages actual content such as text, headings, hyperlinks, images, tables, list, forms, videos, and more. The <BODY> tag can have the following attributes.
Attributes of <BODY> Tag
| Attributes | Value | Description |
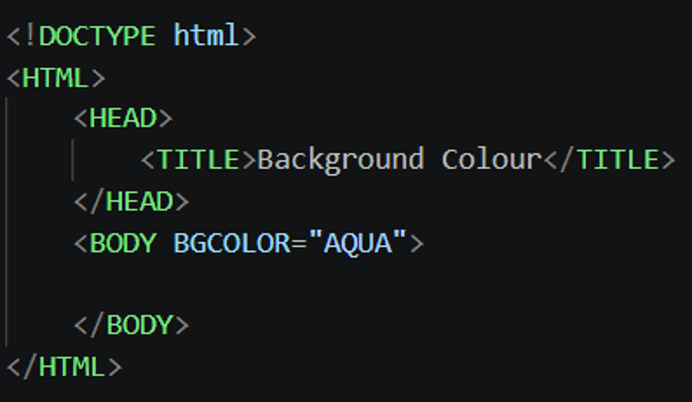
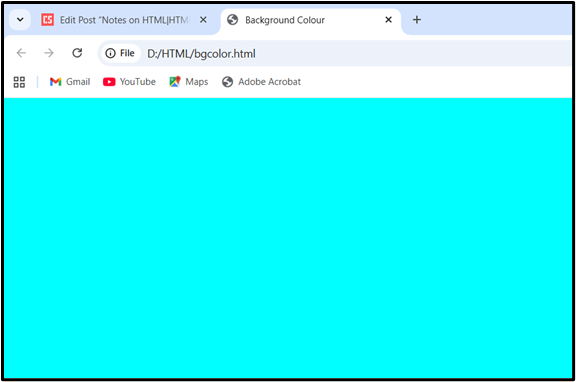
| bgcolor | color_name | Sets the background color of a document |
| background | filename or URL | Sets the background image of a document |
| text | color_name | Sets the color of the text in a document |
| link | color_name | Sets the color for unvisited links in a document |
| alink | color_name | Sets the color for active links in a document |
| vlink | color_name | Sets the color for visited links in a document |
Example 1: Background Colour
OUTPUT
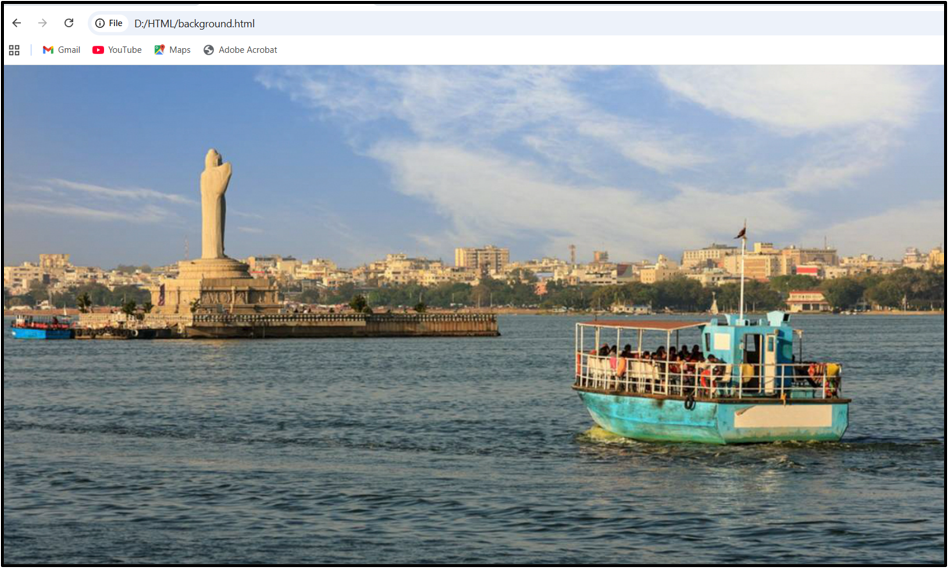
Example 2: Using a Background Image
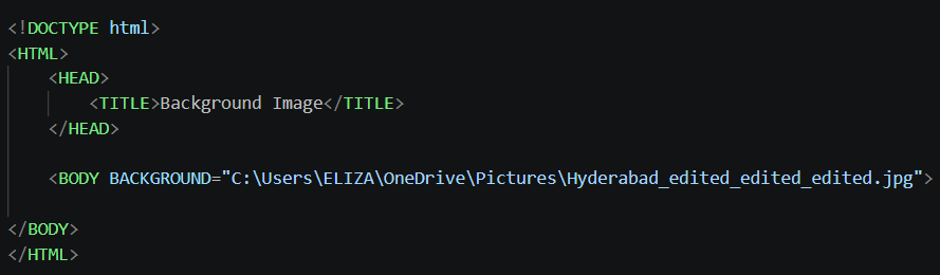
OUTPUT
HTML – Headings
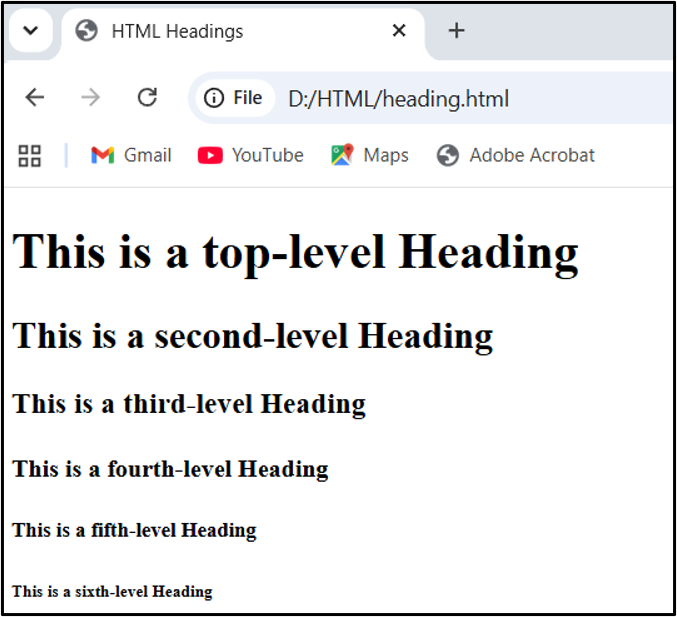
Headings are important in HTML documents. Almost every document starts with a heading. HTML headings are used to define titles and subtitles on a webpage. Headings break a document into sections. We can use different sizes for headings. HTML provides six levels of headings. The heading elements are H1, H2, H3, H4, H5, and H6, where <h1> represents the most important (and largest) heading and <h6> represents the least important (and smallest) heading.
We can use headings to organize our web into hierarchical levels. The top-level heading, H1 actually is the title of our page, i.e., it appears in a browser window at the top of the web page. We can also use a second level heading (denoted by the H2 tag) to define a major division in the page, and a third level heading (using the H3 tag) to define a sublevel division within a major division. The font size decreases as the heading level increases. (Default sizes for first-through sixth-level headings are, respectively, 24, 18, 14, 12, 10, and 8 point font).
Heading Tags
| Tag | Description |
| <h1> | Largest and most important heading |
| <h2> | Second-level heading |
| <h3> | Third-level heading |
| <h4> | Fourth-level heading |
| <h5> | Fifth-level heading |
| <h6> | Smallest heading |
Example
<!DOCTYPE HTML>
<HTML>
<HEAD>
<TITLE>HTML Headings</TITLE>
</HEAD>
<BODY>
<H1> This is a top-level Heading</H1>
<H2> This is a second-level Heading</H2>
<H3> This is a third-level Heading</H3>
<H4> This is a fourth-level Heading</H4>
<H5> This is a fifth-level Heading</H5>
<H6> This is a sixth-level Heading</H6>
</BODY>
</HTML>
OUTPUT
Align Attribute in Heading Element
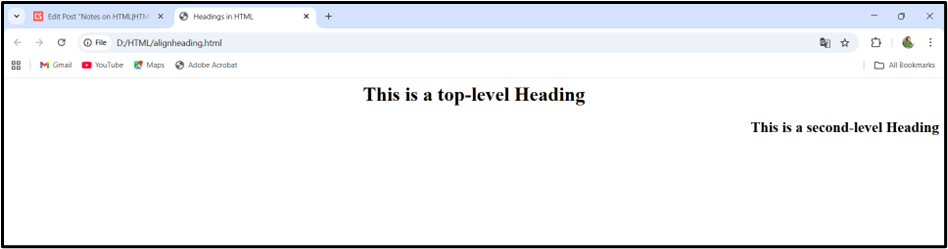
The align attribute is used to specify the alignment of the heading element.
Syntax
<h1 align = “left / right / center / justify”>
Example
<!DOCTYPE HTML>
<HTML>
<HEAD>
<TITLE>Headings in HTML</TITLE>
</HEAD>
<BODY>
<H1 align= “center”> This is a top-level Heading</H1>
<H2 align=”right”> This is a second-level Heading</H2>
</BODY>
</HTML>
OUTPUT
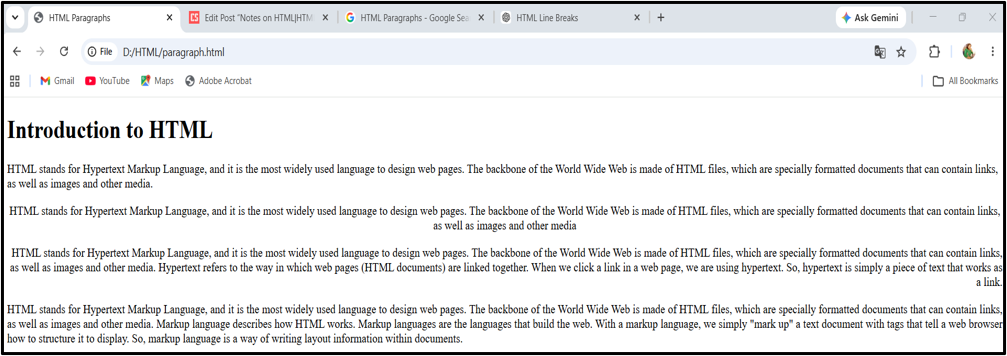
HTML – Paragraphs
In HTML, the <p> tag is used to define a paragraph. Each paragraph is written between the opening <p> tag and the closing </p> tag. We can write multiple paragraphs using multiple <p> tags.
Syntax:
<p>This is a paragraph.</p>
Align Attribute of Paragraph Element:
The align attribute was used to specify how paragraph text should be aligned horizontally within the <p> element.
| Attribute Values | Description |
| left | It sets the text left-align. |
| right | It sets the text right-align. |
| center | It sets the text center-align. |
| justify | It is used to set text to both left and right margin of the page. |
Example
<!DOCTYPE HTML>
<HTML>
<HEAD>
<TITLE>HTML Paragraphs</TITLE>
</HEAD>
<BODY>
<H1> Introduction to HTML </H1>
<P> HTML stands for Hypertext Markup Language, and it is the most widely used language to design web pages. The backbone of the World Wide Web is made of HTML files, which are specially formatted documents that can contain links, as well as images and other media.</p>
<P align=”center”> HTML stands for Hypertext Markup Language, and it is the most widely used language to design web pages. The backbone of the World Wide Web is made of HTML files, which are specially formatted documents that can contain links, as well as images and other media </p>
<P align=”right”> HTML stands for Hypertext Markup Language, and it is the most widely used language to design web pages. The backbone of the World Wide Web is made of HTML files, which are specially formatted documents that can contain links, as well as images and other media. Hypertext refers to the way in which web pages (HTML documents) are linked together. When we click a link in a web page, we are using hypertext. So, hypertext is simply a piece of text that works as a link.</p>
<P align=”justify”>HTML stands for Hypertext Markup Language, and it is the most widely used language to design web pages. The backbone of the World Wide Web is made of HTML files, which are specially formatted documents that can contain links, as well as images and other media. Markup language describes how HTML works. Markup languages are the languages that build the web. With a markup language, we simply “mark up” a text document with tags that tell a web browser how to structure it to display. So, markup language is a way of writing layout information within documents. </p>
</BODY>
</HTML>
OUTPUT
HTML – Comments
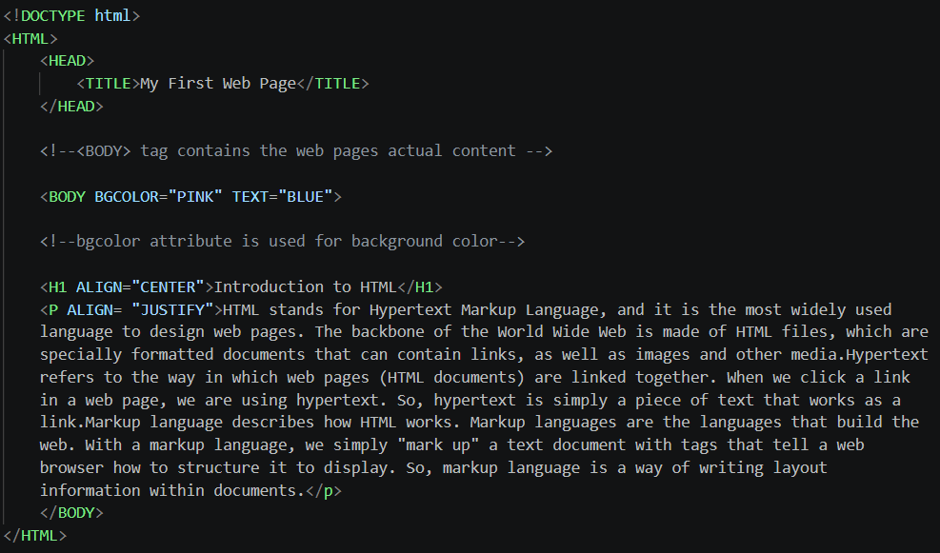
Comments can be inserted in the HTML code to make it more readable and understandable. We can use comments to explain code, which can help us when we edit the source code at a later stage. This is especially useful if we have a lot of code. Comments are not displayed in the browser.
HTML comments line are indicated by the special beginning tag <!- – and ending tag – ->. We can comment multiple lines by the special beginning tag <!- – and ending tag – ->.
Example
HTML – Formatting Tags
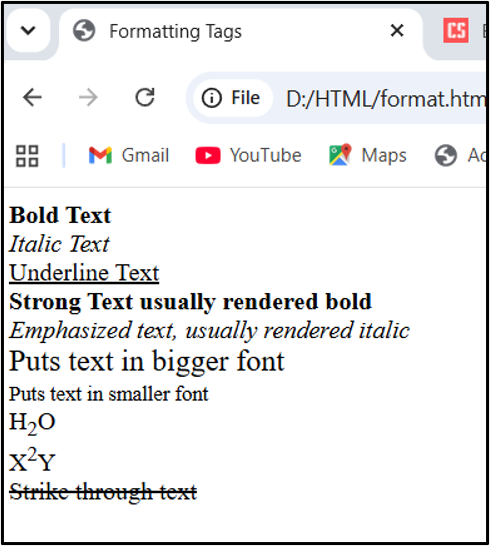
HTML formatting tags are used to change the visual appearance or meaning of text on a webpage, such as making text bold, italic, underlined, highlighted, or smaller.
HTML uses tags like <B> and <I> for formatting output, like bold or italic text. These HTML tags are called Formatting Tags.HTML has two ways to include italic or bold text on web page. The first way involves using literal tags: the B (Bold) tags and I (Italic). The second way is to use logical tags: the EM (emphasis) and Strong tags. Most browsers displays the I (italic) and EM (Emphasis) tags identically, just as they display the B (Bold) and strong tags identically.
The following table depicts a list of Formatting Tags commonly used in HTML:
| Tag | Description |
| <B> | Makes text bold |
| <STRONG> | Indicates important text, same visual effect as the as the <B> tag. |
| <I> | Makes text italic |
| <EM> | Emphasizes text, provides same visual effect as the <I> tag. |
| <U> | Underlines text |
| <BIG> | To define Bigger Text |
| <SMALL> | To define Smaller Text |
| <SUB> | Formats text as a subscript (lowered baseline). |
| <SUP> | Formats text as a superscript (raised baseline). |
| <MARK> | To mark or highlight the important text |
| <STRIKE> | To strike through text |
| <CENTER> | To set text/image as Center Aligned |
| <DEL> | Indicates deleted or removed text, visually rendered with a |
| <INS> | Represents inserted or added text, usually styled with an underline. |
Example
<!DOCTYPE html>
<HTML>
<HEAD>
<TITLE>Formatting Texts</TITLE>
</HEAD>
<BODY>
<B> Bold Text </B><BR>
<I> Italic Text </I><BR>
<U> Underline Text </U><BR>
<STRONG> Strong Text usually rendered bold </STRONG><BR>
<EM> Emphasized text, usually rendered italic </EM><BR>
<BIG> Puts text in bigger Font </BIG><BR>
<SMALL> Puts text in smaller Font </SMALL><BR>
H<SUB>2</SUB>O<BR>
X<SUP>2</SUP>Y<BR>
<STRIKE> Strike through text </STRIKE><BR>
</BODY>
</HTML>
OUTPUT
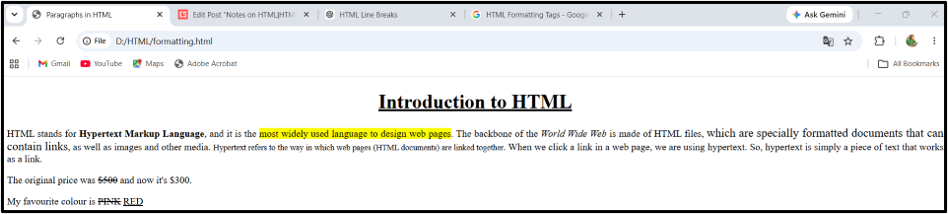
Example – 2
<!DOCTYPE HTML>
<HTML>
<HEAD>
<TITLE> Paragraphs in HTML</TITLE>
</HEAD>
<BODY>
<center><H1> <u>Introduction to HTML </u></H1></center>
<P align= “justify”> HTML stands for <b>Hypertext Markup Language</b>, and it is the <mark>most widely used language to design web pages</mark>. The backbone of the <i>World Wide Web</i> is made of HTML files, <big>which are specially formatted documents that can contain links</big>, as well as images and other media. <small>Hypertext refers to the way in which web pages (HTML documents) are linked together</small>. When we click a link in a web page, we are using hypertext. So, hypertext is simply a piece of text that works as a link.</p>
<P> The original price was <DEL>$500</DEL> and now it’s $300.</p>
<p> My favourite colour is <DEL>PINK</DEL> <INS>RED</INS></p>
</BODY>
</HTML>
OUTPUT
HTML – Fonts
The <FONT> tag allows to specify the size, color and style of a section of text.
The following table describes the tag and attributes one may use to set font characteristics.
| Tag/Attribute | Description |
| <FONT> | Sets font characteristics for text |
| SIZE= “ ” | Specifies font sizes from 1 to 7, 3 is the default size. |
| COLOR= “ ” | Specifies font colour. This colour applies only to the text surrounded by <FONT> tag. |
| FACE= “ ” | Specifies type faces. |
Setting Font Sizes:
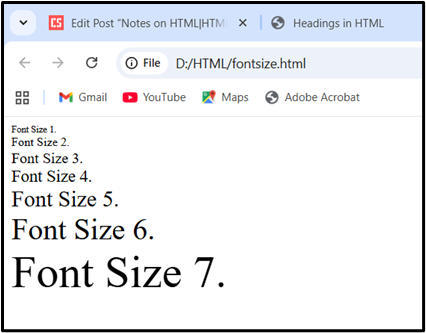
The <FONT> tag uses the SIZE attribute to change the size of a font. There are seven “absolute” (or fixed) sizes, numbered from 1 to 7, that we can set using the SIZE attribute of the <FONT> tag. The default is 3, which is the same as regular paragraph text; 1 is the smallest and 7 is the largest.
Example
<!DOCTYPE HTML>
<HTML>
<HEAD>
<TITLE>My Web Page</TITLE>
</HEAD>
<BODY>
<P>
<FONT SIZE= “1”> Font Size 1.</FONT> <BR>
<FONT SIZE= “2”> Font Size 2.</FONT> <BR>
<FONT SIZE= “3”> Font Size 3.</FONT> <BR>
<FONT SIZE= “4”> Font Size 4.</FONT> <BR>
<FONT SIZE= “5”> Font Size 5.</FONT> <BR>
<FONT SIZE= “6”> Font Size 6.</FONT> <BR>
<FONT SIZE= “7”> Font Size 7.</FONT> <BR>
</P>
</BODY>
</HTML>
OUTPUT
Changing the FONT Color and FONT Face
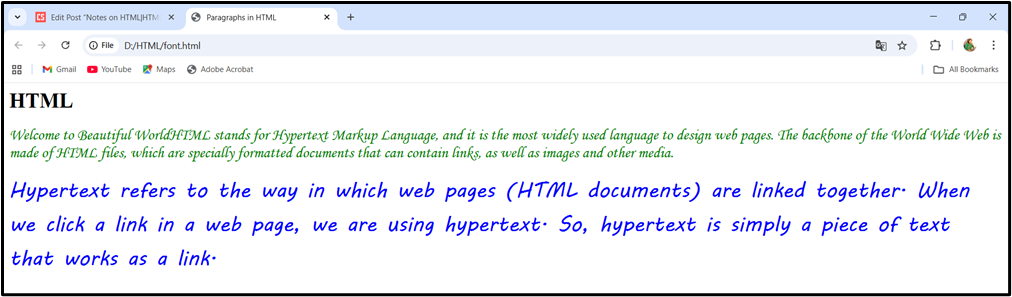
The <FONT> tag uses the COLOR attribute to change the color of a font and FACE attribute to change the attribute.
Example
<!DOCTYPE html>
<HTML>
<HEAD>
<TITLE> Paragraphs in HTML</TITLE>
</HEAD>
<BODY>
<H1> HTML </H1>
<FONT SIZE= “5” COLOR= “GREEN” FACE= “MONOTYPE CORSIVA”><P>HTML stands for Hypertext Markup Language, and it is the most widely used language to design web pages. The backbone of the World Wide Web is made of HTML files, which are specially formatted documents that can contain links, as well as images and other media.</P></FONT>
<FONT SIZE= “6” COLOR= “BLUE” FACE= “MV BOLI”><P>Hypertext refers to the way in which web pages (HTML documents) are linked together. When we click a link in a web page, we are using hypertext. So, hypertext is simply a piece of text that works as a link.</P></FONT>
</BODY>
</HTML>
OUTPUT
HTML – Line Breaks
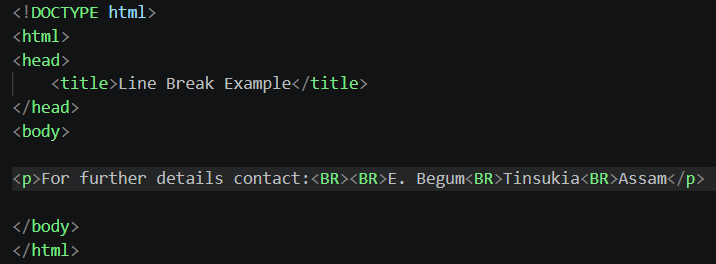
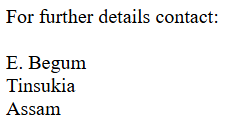
To break a line, <BR> tag is used. Whenever we use the <BR> tag, anything following it starts on the next line. The <BR> tag is an unpaired tag (empty tag). It does not have a closing tag.
Example
OUTPUT
HTML – Horizontal Rule
The HTML <HR> tag is used for creating a horizontal line. The <HR> tag is a stand-alone or empty tag. It requires a start tag but must not have an end tag. The <HR> tag allows us to add horizontal rules to web pages. A horizontal rule is a good option to divide a page into sections or to separate headers and footers from the rest of the page.
Changing the Height of a Horizontal Rule
To change the height of a horizontal rule, the SIZE attribute value in the <HR> tag can be used. The value we set is the rule’s height or thickness in pixels. The following example is used for creating a horizontal rule that is 10 pixels thick.
Example:
<P>This is a normal rule:</P>
<HR>
<P>This is a 10-pixel thick horizontal rule:</P>
<HR SIZE= “10”>
Changing the width of a Horizontal Rule
We can change the width of a horizontal rule, either by setting the width in actual pixels or by specifying a percentage of the total width of the browser window. By default, horizontal rules are centered in the browser window. Following is an example of creating a 15-pixel sized horizontal rule with a width that is 75 percent of a browser’s window.
Example
<P>This is a 75% wide, 15-pixel thick horizontal rule:</P>
<HR WIDTH= “75%” SIZE= “15” >
Changing Between Shaded and Unshaded Horizontal Rule
The default setting for a rule is “shaded”. To set an “unshaded” horizontal rule, add the NOSHADE attribute to the <HR>tag.
Example
<P>This is an unshaded, 15-pixel thick horizontal rule:</P>
<HR>
<P>This is a 10-pixel thick horizontal rule:</P>
<HR SIZE= “15” NOSHADE>
Setting the Alignment of a Horizontal Rule
The ALIGN attribute in the<HR> tag is used to left-align or right-align a horizontal rule (center alignment is the default)
Example
<P>This is a left-aligned, 50% wide, 20-pixel thick horizontal rule (Shaded)</P>
<HR ALIGN= “LEFT” WIDTH= “50%” SIZE= “20”>
Attributes of <HR> Tag
| Attributes | Value | Description |
| Size | pixels or % | Specifies the height of a <HR> element |
| Width | pixels or % | Specifies the width of a <HR> element |
| Align | Left/ center/ right | Specifies the alignment of a <HR> element |
| Color | color_name | Specifies the color of the <HR> element |
| Noshade | noshade | Specifies that <HR> element should render in one solid color (noshaded), instead of a shaded color. |
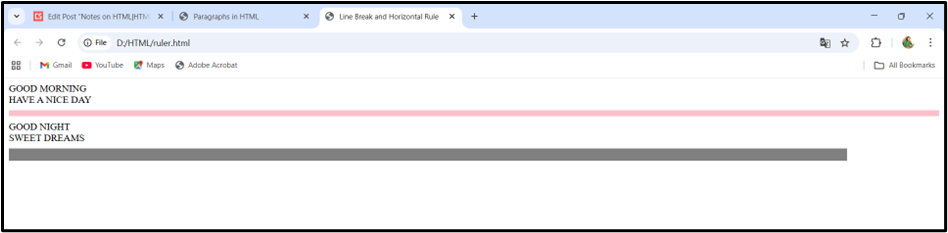
Example
<!DOCTYPE html>
<HTML>
<HEAD>
<TITLE>Line Break and Horizontal Rule</TITLE>
</HEAD>
<BODY>
GOOD MORNING <BR>
HAVE A NICE DAY<BR>
<HR ALIGN= “LEFT” SIZE= “10%” WIDTH= “80%”>
GOOD NIGHT <BR>
SWEET DREAMS<BR>
<HR ALIGN= “LEFT” SIZE= “20%” WIDTH= “90%” NOSHADE COLOR= “BLUE”>
</BODY>
</HTML>
OUTPUT
<ADDRESS>, <BLOCKQUOTE> and <PRE> Tags
<ADDRESS>
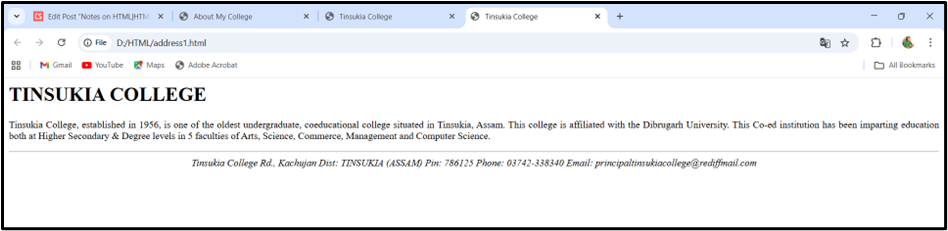
The <ADDRESS> tag is used to write addresses and contact information in a document. The text inside the <ADDRESS> tag appears in italics.
The Address tag is used to define a signature block for Web page. It might contain name, title, organizational or business affiliation, as well as information on how to contact. A horizontal rule usually separates an address from the rest of a web page.
Example
<!DOCTYPE html>
<HTML>
<HEAD>
<TITLE>Tinsukia College</TITLE>
</HEAD>
<BODY>
<H1>TINSUKIA COLLEGE</H1>
<P ALIGN=”JUSTIFY”>Tinsukia College, established in 1956, is one of the oldest undergraduate, coeducational college situated in Tinsukia, Assam. This college is affiliated with the Dibrugarh University. This Co-ed institution has been imparting education both at Higher Secondary & Degree levels in 5 faculties of Arts, Science, Commerce, Management and Computer Science. </P>
<HR>
<ADDRESS ALIGN=”CENTER”>Tinsukia College Rd., Kachujan
Dist: TINSUKIA (ASSAM)
Pin: 786125
Phone: 03742-338340
Email: principaltinsukiacollege@rediffmail.com
</ADDRESS>
</BODY>
</HTML>
OUTPUT:
<BLOCKQUOTE>
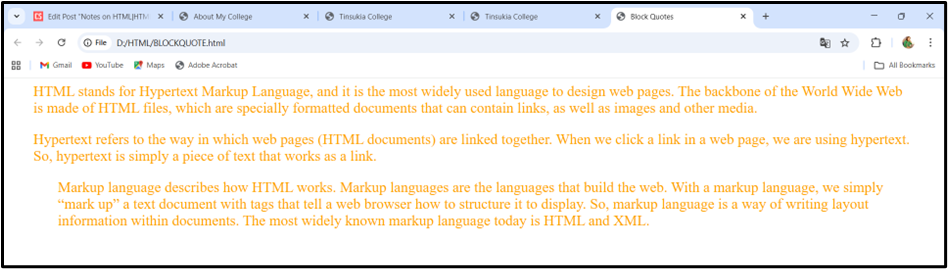
The <BLOCKQUOTE> tag indents the content inside the tag by adding margins on both sides, from the left as well as right. It is mainly used to write quotations. The <BLOCKQUOTE> tag double-indents a block of text from both margins.
Example
<!DOCTYPE html>
<HTML>
<HEAD>
<TITLE>Block Quotes</TITLE>
</HEAD>
<BODY>
<BLOCKQUOTE>
<FONT COLOR=”orange” SIZE=”5″>
<P>HTML stands for Hypertext Markup Language, and it is the most widely used language to design web pages. The backbone of the World Wide Web is made of HTML files, which are specially formatted documents that can contain links, as well as images and other media.
<P> Hypertext refers to the way in which web pages (HTML documents) are linked together. When we click a link in a web page, we are using hypertext. So, hypertext is simply a piece of text that works as a link.</P>
<BLOCKQUOTE>
<P> Markup language describes how HTML works. Markup languages are the languages that build the web. With a markup language, we simply “mark up” a text document with tags that tell a web browser how to structure it to display. So, markup language is a way of writing layout information within documents. The most widely known markup language today is HTML and XML.</P>
</BLOCKQUOTE>
</FONT>
</BLOCKQUOTE>
</BODY>
</HTML>
OUTPUT
<PRE>
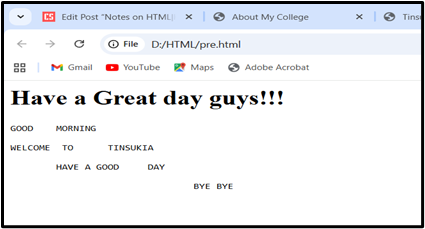
The <PRE> tag displays the text exactly in the same way, as we typed it. It displays text exactly as written, including spaces and line breaks. One of the primary uses of the <PRE> tag is to display text in a tabular or columnar format in which we want to make sure that the column remains properly aligned.
Example
<!DOCTYPE html>
<HTML>
<HEAD>
<TITLE>Tinsukia College</TITLE>
</HEAD>
<BODY>
<H1>Have a Great day guys!!!</H1>
<PRE>
GOOD MORNING
WELCOME TO TINSUKIA
HAVE A GOOD DAY
BYE BYE
<PRE>
</BODY>
</HTML>
OUTPUT
<abbr>, <details> and <summary> tags
<abbr>
The <abbr> tag defines an abbreviation or acronym; hovering over it displays the full text via a tooltip. It works with the title attribute, which provides the full expansion of the term and displays it as a tooltip when a user hovers over the abbreviated text.
Example
<p>The <abbr title=”Hypertext Markup Language”>HTML</abbr> is used to structure web pages.</p>
<abbr title=”World Health Organization”>WHO</abbr>
<details> & <summary>
The HTML <details> and <summary> tags work together to create an interactive discloser widget, often referred to as an “accordion” or “discloser triangle”. This allows users to show or hide additional content on demand.
<details>
- The <details> tag acts as a container for the entire discloser widget.
- It encloses both the visible summary and the hidden content.
- By default, the content within <details> (excluding the <summary>) is hidden.
- The open attribute can be added to the <details> tag to make the content visible by default when the page loads. Without the open attribute, the widget is closed when the page loads.
<summary>
- The <summary> tag provides the visible heading or title for the discloser widget.
- It is placed inside the <details> tag and is always displayed.
- Clicking the <summary> element toggles the visibility of the content within the parent <details> tag.
The summary content can be plain text, or we can use other HTML elements like headings (<h4>) or text formatting (<strong>) inside it.
Example
<!DOCTYPE HTML>
<HTML>
<HEAD>
<TITLE>Details and Summary Tag</TITLE>
</HEAD>
<BODY>
<DETAILS>
<SUMMARY>Click to view more information</SUMMARY>
<P>This is the additional content that is hidden by default. The content will be revealed when the summary is clicked</P>
</DETAILS>
<BR><BR>
<DETAILS OPEN>
<SUMMARY>Already open details</SUMMARY>
<P>This content is visible by default because of the open attribute</P>
</DETAILS>
</BODY>
</HTML>
OUTPUT

HTML- Images
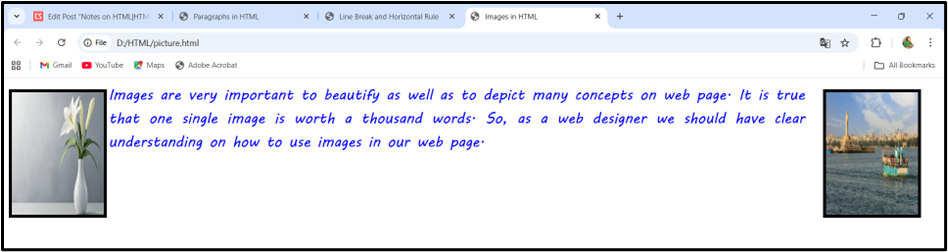
Images are very important to beautify as well as to depict many concepts on web page. It is true that one single image is worth a thousand words. So, as a web designer we should have clear understanding on how to use images in our web page.
Adding Images (Inserting images)
We can add or insert an image in web page by using HTML <IMG> tag. The <IMG> tag is an empty tag, which means that it contains attributes only, and has no closing tag. To display an image on a web page, we need to use the SRC attribute of <IMG> tag. The SRC stands for “source”.
The syntax of using <IMG> tag is:
<IMG SRC = “imagefile”>
<IMG> Attributes
| Attribute | Value | Description |
| src | URL | Specifies the URL or location of an image, where the image is stored |
| align | top, bottom, middle, left, right | Specifies the alignment of an image according to surrounding elements. |
| alt | text | Specifies an alternate text for an image, if the image cannot be displayed |
| title | text | Specifies title text as pop-up tips. |
| border | pixels | Specifies the width of the border around an image. |
| height | pixels | Specifies the height of an image. |
| width | pixels | Specifies the width of an image. |
| hspace | pixels | Specifies the white space on left and right side of an image |
| vspace | pixels | Specifies the white space on top and bottom of an image |
Example
<!DOCTYPE html>
<HTML>
<HEAD>
<TITLE> Images in HTML</TITLE>
</HEAD>
<BODY>
<IMG SRC=”D:\Pictures\flower.jpg” ALIGN=”LEFT” BORDER=”5″ HEIGHT=”200″ WIDTH=”150″ VSPACE=”10″>
<IMG SRC=”D:\Pictures\Hyderabad.jpg” BORDER= “5” ALIGN= “RIGHT” ALT= “Sample Picture” TITLE= “Beautiful Picture” HEIGHT= “200” WIDTH= “150” VSPACE= “10” HSPACE= “30”>
<FONT SIZE=”5″ COLOR=”BLUE” FACE=”MV BOLI”><P ALIGN= “JUSTIFY”>Images are very important to beautify as well as to depict many concepts on web page. It is true that one single image is worth a thousand words. So, as a web designer we should have clear understanding on how to use images in our web page.</P>
</BODY>
</HTML>
OUTPUT
HTML – Lists
Lists are powerful tools used to organize similar kinds of information i.e., lists are used to group related pieces of information together, so they are clearly associated with each other and easy to read.
Working with Lists (Creating Lists)
Lists are the best method of organizing information and presenting it in a structured fashion.
There are three types of lists. They are:
- Ordered List (Numbered List)
- Unordered List (Bulleted List)
- Definition List
Ordered List
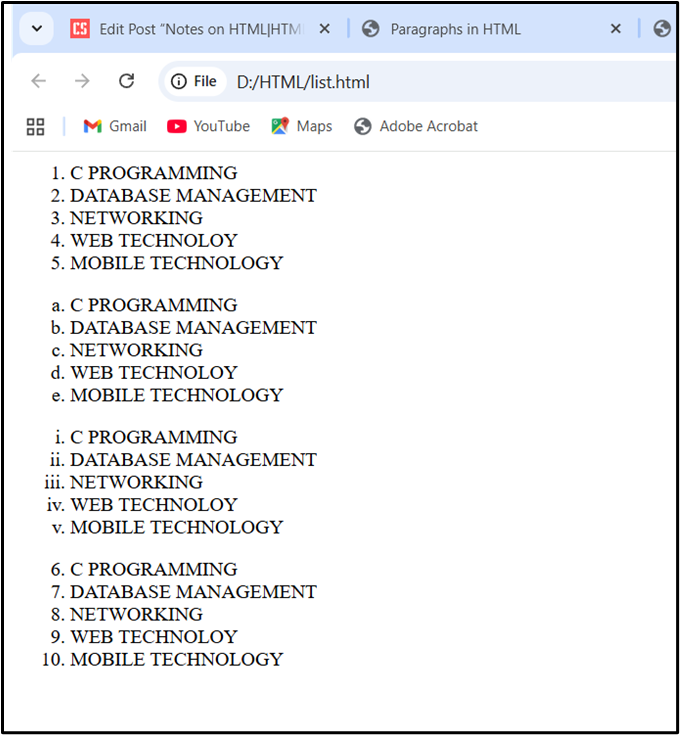
An Ordered List is a numbered list. Ordered List is used when the order or priority of items is important. In HTML, an ordered list starts with the <OL> tag. It is used in conjunction with the <LI> (LIST Item) tag. The list items are marked with numbers. The numbering starts at one and is incremented by one for each successive list item.
We can use the TYPE attribute with <OL>tag to specify the type of numbers. The values that we can use with the TYPE attribute are “A”, “a”, “I”, “i” for uppercase letters, lowercase letters, uppercase Roman numerals, lowercase Roman numerals. By default, it is generic number.
By default, index for list items begins with first number or initial character. We can use START attribute with <OL>tag to specify the beginning of any index. The START attribute in an <OL>tag is used to start the numbering sequence at a particular number.
Example
<!DOCTYPE html>
<HTML>
<HEAD>
<TITLE>Ordered List in HTML</TITLE>
</HEAD>
<BODY>
<OL>
<LI> C PROGRAMMING</LI>
<LI> DATABASE MANAGEMENT</LI>
<LI> NETWORKING</LI>
<LI> WEB TECHNOLOY</LI>
<LI> MOBILE TECHNOLOGY</LI>
</OL>
<OL TYPE= “a”>
<LI> C PROGRAMMING</LI>
<LI> DATABASE MANAGEMENT</LI>
<LI> NETWORKING</LI>
<LI> WEB TECHNOLOY</LI>
<LI> MOBILE TECHNOLOGY</LI>
</OL>
<OL TYPE= “i”>
<LI> C PROGRAMMING</LI>
<LI> DATABASE MANAGEMENT</LI>
<LI> NETWORKING</LI>
<LI> WEB TECHNOLOY</LI>
<LI> MOBILE TECHNOLOGY</LI>
</OL>
<OL START= “11”>
<LI> C PROGRAMMING</LI>
<LI> DATABASE MANAGEMENT</LI>
<LI> NETWORKING</LI>
<LI> WEB TECHNOLOY</LI>
<LI> MOBILE TECHNOLOGY</LI>
</OL>
<BODY>
</HTML>
OUTPUT
Reversing an Ordered List Items
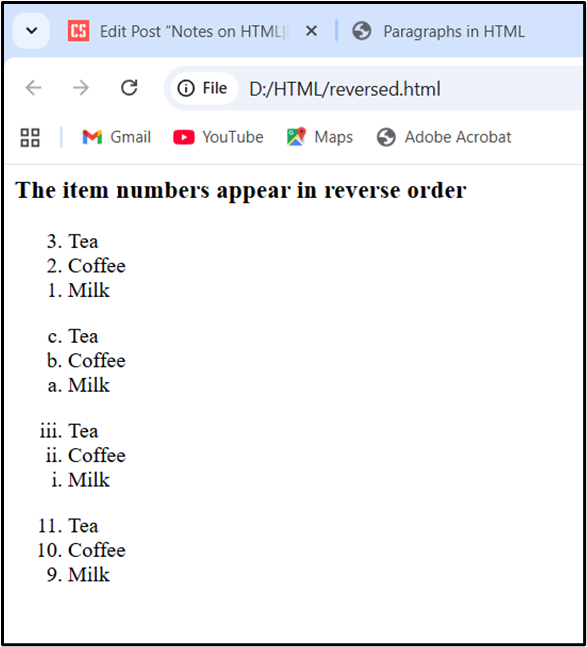
The reversed attribute of the <ol> tag in HTML is used to set reversed ordering of list items in an ordered list. The items themselves are not reversed, only the numbering.
Example
<!DOCTYPE html>
<html>
<body>
<h3> The item numbers appear in reverse order</h3>
<ol reversed>
<li>Tea</li>
<li>Coffee</li>
<li>Milk</li>
</ol>
<br>
<ol type=”a” reversed>
<li>Tea</li>
<li>Coffee</li>
<li>Milk</li>
</ol>
<br>
<ol type=”i” reversed>
<li>Tea</li>
<li>Coffee</li>
<li>Milk</li>
</ol>
<br>
<ol start=”11″ reversed>
<li>Tea</li>
<li>Coffee</li>
<li>Milk</li>
</ol>
</body>
</html>
OUTPUT
The item numbers appear in reverse order:
Unordered List
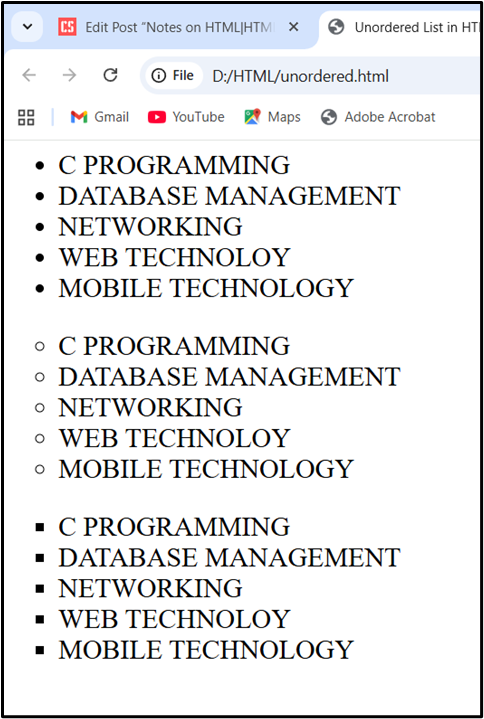
An Unordered List is a collection of related items that have no special order or sequence. This list is created by using <UL> tag. The <UL> tag defines a bulleted list of items. The <LI> (List Item) tag is nested inside the <UL> tag and defines each item within the list.
The bullet itself comes in three types: “disc”, “circle” and “square”. The TYPE attribute is used with <UL> tag to specify the type of bullet. By default, it is a “disc”.
Example
<HTML>
<HEAD>
<TITLE>Unordered List in HTML</TITLE>
</HEAD>
<BODY>
<FONT SIZE=”5″>
<UL>
<LI> C PROGRAMMING</LI>
<LI> DATABASE MANAGEMENT</LI>
<LI> NETWORKING</LI>
<LI> WEB TECHNOLOY</LI>
<LI> MOBILE TECHNOLOGY</LI>
</UL>
<UL TYPE= “circle”>
<LI> C PROGRAMMING</LI>
<LI> DATABASE MANAGEMENT</LI>
<LI> NETWORKING</LI>
<LI> WEB TECHNOLOY</LI>
<LI> MOBILE TECHNOLOGY</LI>
</UL>
<UL TYPE= “square”>
<LI> C PROGRAMMING</LI>
<LI> DATABASE MANAGEMENT</LI>
<LI> NETWORKING</LI>
<LI> WEB TECHNOLOY</LI>
<LI> MOBILE TECHNOLOGY</LI>
</UL>
<BODY>
</HTML>
OUTPUT
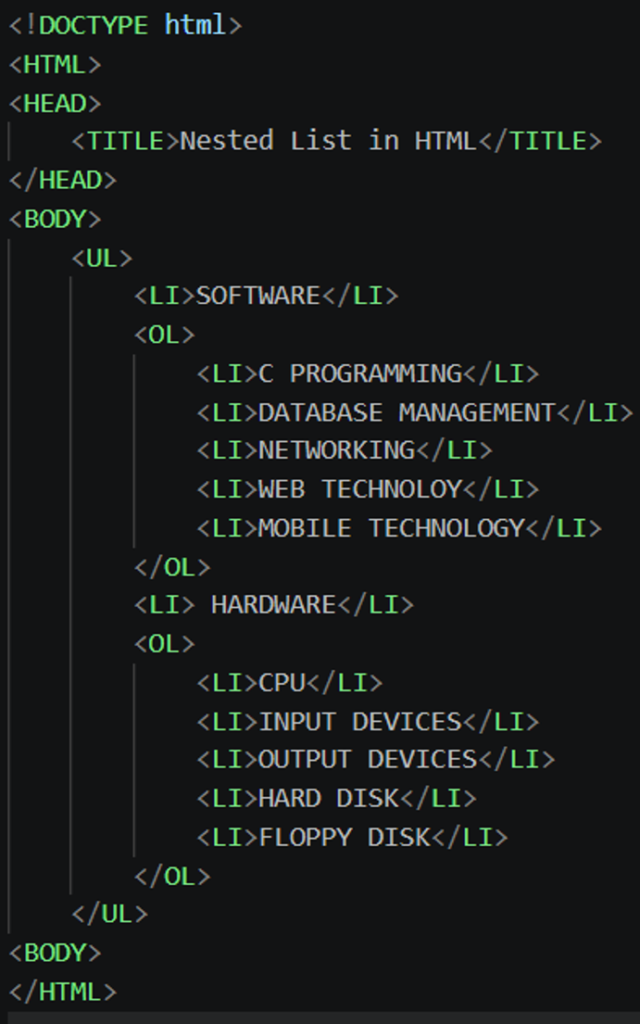
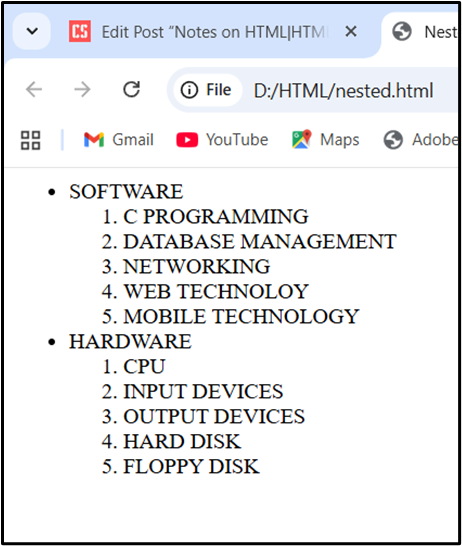
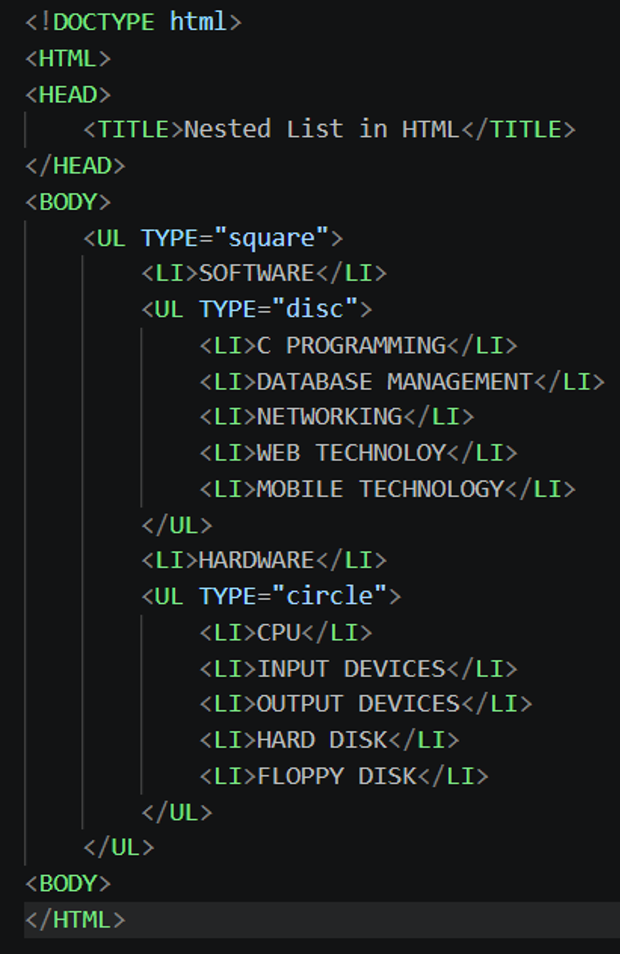
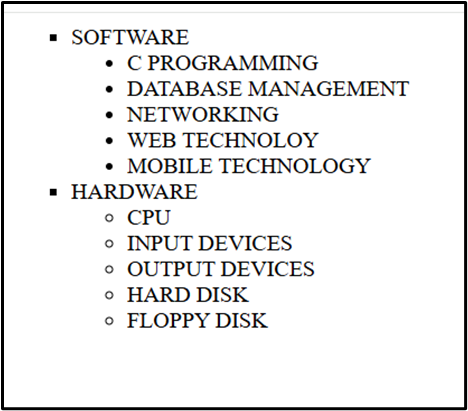
Nested Lists
A nested list is a list within a list. We can nest a list inside another list. The browser automatically indents nested list levels. We can nest the same or different kinds of lists. One of the most common places where we can see a nested list is in the contents of a book.
Example – 1
OUTPUT
Example – 2
OUTPUT
Description List
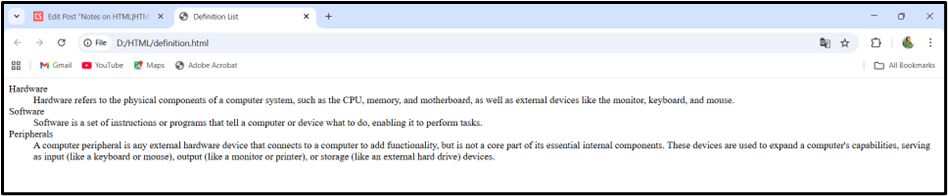
An HTML Description List (formerly known as a definition list) is used to display a collection of terms and their corresponding descriptions in a structured, semantic format. It is commonly used for glossaries, FAQs, product features, or any metadata displayed as key-value pairs.
A description list is built using three essential tags working together:
- <dl>: The Description List container that encloses the entire list.
- <dt>: The Description Term that specifies the name or keyword being defined.
- <dd>: The Description Details that provide the actual definition or value for the term.
Example
<!DOCTYPE html>
<HTML>
<HEAD>
<TITLE>Definition List</TITLE>
</HEAD>
<BODY>
<DL>
<DT>Hardware</DT>
<DD> Hardware refers to the physical components of a computer system, such as the CPU, memory, and motherboard, as well as external devices like the monitor, keyboard, and mouse. </DD>
<DT>Software</DT>
<DD>Software is a set of instructions or programs that tell a computer or device what to do, enabling it to perform tasks.</DD>
<DT>Peripherals</DT>
<DD>A computer peripheral is any external hardware device that connects to a computer to add functionality, but is not a core part of its essential internal components. These devices are used to expand a computer’s capabilities, serving as input (like a keyboard or mouse), output (like a monitor or printer), or storage (like an external hard drive) devices.</DD>
</DL>
</BODY>
</HTML>
OUTPUT
MARQUEE TAG
<MARQUEE> tag is used to scroll text across the screen. It is mainly used to deliver a specific message to the visitor or to scroll ads on a page. Sometimes we might want our text or photos to continuously scroll across the screen. Or maybe we would like it to bounce back and forth across the screen. All these things are possible using HTML marquees. HTML marquees are a piece of code that allows us to create movement on an HTML element (text or image).
Syntax
<MARQUEE attribute_name= “attribute_value”>Text or image </MARQUEE>
<MARQUEE> Attributes
| Attribute | Value | Description |
| behavior | Scroll, slide, alternate | Specifies the type of scrolling |
| bgcolor | colorname | Specifies the background color of the marquee. |
| direction | Up, down, left, right | Specifies the scrolling direction of text |
| height | Pixels or % | Specifies the height of marquee |
| width | Pixels or % | Specifies the width of marquee |
| hspace | pixels | Specifies horizontal space around the marquee. |
| vspace | pixels | Specifies vertical space around the marquee. |
| loop | number | Specifies how many times the marquee text scrolls |
| scrolldelay | milliseconds | Defines how long to delay between each jump. |
| scrollamount | number | Specifies the shift of marquee text. |
Example
<!DOCTYPE html>
<HTML>
<HEAD>
<TITLE> MARQUEE IN HTML </TITLE>
</HEAD>
<BODY>
<H2> TEXT SCROLLING </H2>
<MARQUEE BEHAVIOR= “ALTERNATE” BGCOLOR= “AQUA” DIRECTION= “LEFT” HEIGHT= “50%” WIDTH= “100%” SCROLLDELAY= “30” VSPACE= “20” HSPACE= “20”> WELLCOME TO BEAUTIFUL ASSAM </MARQUEE>
<H2> IMAGE SCROLLING </H2>
<MARQUEE BEHAVIOR=”SLIDE” BGCOLOR= “AQUA” DIRECTION= “UP” SCROLLAMOUNT= “10” HEIGHT= “35%” WIDTH= “100%” LOOP= “5” SCROLLDELAY= “30” VSPACE= “20” HSPACE= “20”>
<IMG SRC=”D:\HTML\NATURE.JPG” HEIGHT=”200” WIDTH=”200”>
</MARQUEE>
</BODY>
</HTML>
Hyperlink in HTML
A hyperlink (or link) is a word, group of words, or image that we can click on to jump to another document or another section on the same page. Hyperlinks, or simply links, connect HTML pages and other resources on the web. We can also link to such resources that are not even HTML pages at all, such as e-mail addresses, pictures and text files etc. Without links, a web page stands alone, disconnected from the rest of the web. With links, that page becomes part of the web.
In HTML, hyperlinks are created using the <A> (Anchor) tag paired with the href attribute to define the destination URL. Anything between the opening <A> tag and the closing </A> tag becomes part of the link and a user can click that part to reach to the linked document.
Syntax
<A href= “URL”> Link Text </A>
Here, the href attribute specifies the destinations of a link. The “Link Text” can be text or image.
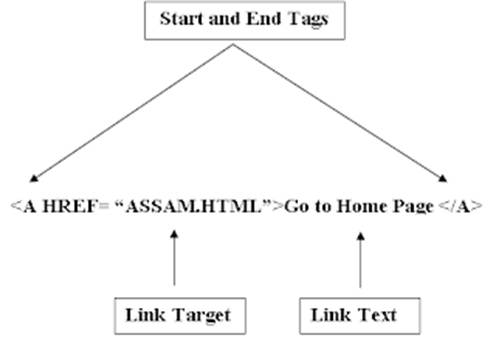
The hypertext links is composed of three elements:
- Start and End tags that enclose the whole link
- The link target
- The link text
HTML – Text Links
In HTML, text links are used to create clickable text that takes the user to another webpage.

<!DOCTYPE html>
<HTML>
<HEAD>
<TITLE> HYPERLINK</TITLE>
</HEAD>
<BODY BGCOLOR=”GREEN” LINK=”PURPLE” VLINK=”YELLOW” ALINK= “BLUE” TEXT=”MAROON”>
<H1> Hyperlinks connect HTML pages</H1>
<A HREF=”D:\EX15.HTML”>Home Page</A>
<P><FONT SIZE=”5″ FACE=”MV BOLI”>A hyperlink (or link) is a word, group of words, or image that we can click on to jump to another document or another section on the same page. Hyperlinks, or simply links, connect HTML pages and other resources on the web. When we include a link on web page, we enable visitors to travel from our web page to another website, another web page on our site or even another location on the same page. We can also link to such resources that are not even HTML pages at all, such as e-mail addresses, pictures and text files etc. Without links, a web page stands alone, disconnected from the rest of the web. With links, that page becomes part of the web.</P>
<P>The hypertext links is composed of three elements:
<UL>
<LI><A HREF=”D:\EX1.HTML”> START & END TAGS</A></LI>
<LI><A HREF=”D:\EX2.HTML”> LINK TARGET</A></LI>
<LI><A HREF=”D:\EX3.HTML”> LINK TEXT</A></LI>
</UL>
</P>
</BODY>
</HTML>
HTML -Image Links
Besides text, we can also include an image inside a hypertext link, which causes the image to display a blue border, indicating that it is a hypertext link that we can click and activate. Web pages often use images for navigation. They are more appealing than plain- text links.
CREATING IMAGE LINKS
To create an image that generates a link, we substitute an <IMG> tag in place of text to which we would anchor our link.
Example
<!DOCTYPE html>
<HTML>
<HEAD>
<TITLE> Image as a Link</TITLE>
</HEAD>
<BODY>
<H3> Image Link</H3>
<A HREF= “D:\EX5.html”><IMG SRC= “NATURE.JPG” BORDER= “5” ALT= “A Sample Picture” TITLE= “Beautiful Picture” HEIGHT= “300” WIDTH= “250”>
</A>
</BODY>
</HTML>
HTML – Email Links
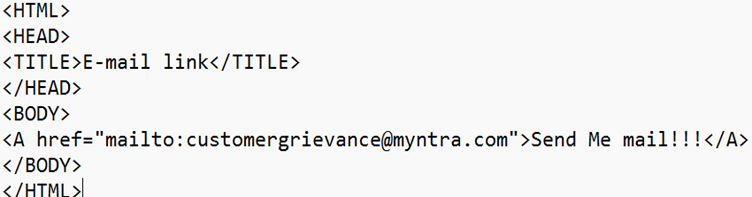
An email works the same way as the links to web pages. Instead of specifying a page address in the href attribute, we specify an email address. Also, an email link uses the mailto: protocol (used to invoke email programs).
Creating Email Links
To create an email link, add an anchor link with the mailto: protocol indicator and the email address.
Example -1
<!DOCTYPE HTML>
Example – 2
<!DOCTYPE html>
<HTML>
<HEAD>
<TITLE>Tinsukia College</TITLE>
</HEAD>
<BODY>
<H1>TINSUKIA COLLEGE</H1>
<P ALIGN=”JUSTIFY”>Tinsukia College, established in 1956, is one of the oldest undergraduate, coeducational college situated in Tinsukia, Assam. This college is affiliated with the Dibrugarh University. This Co-ed institution has been imparting education both at Higher Secondary & Degree levels in 5 faculties of Arts, Science, Commerce, Management and Computer Science. Currently, the college has altogether 17 departments, viz. Assamese, Bengali, Botany, Chemistry, Commerce, Computer Science, Economics, English, Geography, Hindi, History, Mathematics, Philosophy, Physics, Political Science, Statistics and Zoology. Besides, it provides two professional degree courses, viz, BBA and BCA. The college has a study centre of Krishna Kanta Handique State Open University under which several UG and PG courses are offered.</P>
<HR>
<ADDRESS ALIGN=”CENTER”>Tinsukia College Rd., Kachujan
Dist: TINSUKIA (ASSAM)
Pin: 786125
Phone: 03742-338340
<A HREF= “MAILTO:principaltinsukiacollege@rediffmail.com”> Tinsukia College</A>
</ADDRESS>
</BODY>
</HTML>
OUTPUT

HTML – Special Characters
In HTML, special characters that have special meanings (such as <, >, &, etc.) need to be represented using character entities to avoid parsing errors. There are literally hundreds of special character entities currently available. HTML special characters were introduced with HTML 4.0 in December 1997. They provided a standardized way of representing characters outside the commonly used ASCII encoding.
In HTML, these special characters are referred to as entities, and they are created by using codes beginning with an ampersand (&), followed by an entity name or an entity number, and ending with a semicolon. The entity names and entity numbers both represent the same thing; we can use either one.
HTML special characters are assigned an entity name and an entity number, both of which can be used to render the character in an HTML document. These codes and names have a specific format, which is generally represented as &#xxxx; for numbers and &xxxx; for names, where xxxx is either a name or a number. Numbers are valid in both decimal and hexadecimal format.
For example, the code for a right-facing arrow, also known as the ‘greater than’ sign, is > for the entity number and > for the entity name. Inserting the code for either of those into an HTML document will render a ‘>’ when displayed to the user.
Common HTML Special Characters
| Character | Description | Number code | Entity code |
| “ | Double quotation | " | " |
| ‘ | Single quoation | ' | ' |
| & | ampersand | & | & |
| © | copyright | © | © |
| ® | Registered symbol | ® | ® |
| ™ | trademark | ™ | ™ |
| non-breaking space |   | | |
| < | less than | < | < |
| > | greater than | > | > |
Note: Entity names are case sensitive.
Example
<!DOCTYPE html>
<html>
<head>
<title>My first web page</title>
</head>
<body>
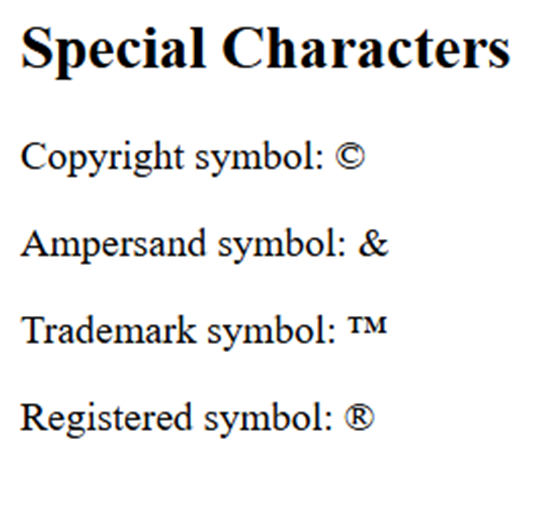
<h1> Special Characters </h1>
<p>Copyright symbol: ©</p>
<p>Ampersand symbol: &</p>
<p>Trademark symbol: ™</p>
<p>Registered symbol: ®</p>
</body>
</html>
OUTPUT
Adding Emojis to Webpage
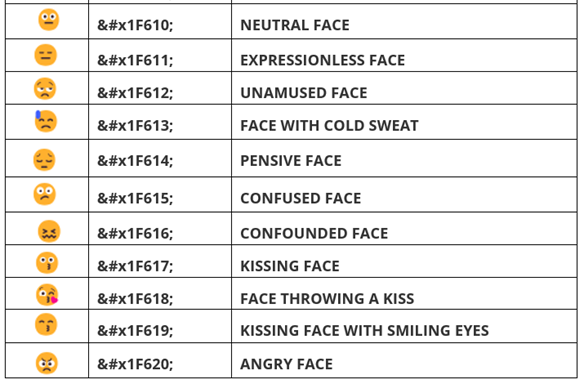
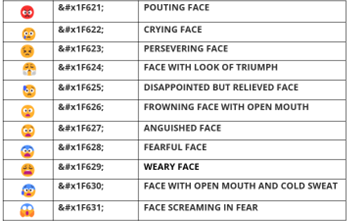
We can also display emojis using an entity code. All emojis have a numeric entity code in HTML, but not all of them have a named entity code. Some examples include:

Example
<!DOCTYPE html>
OUTPUT
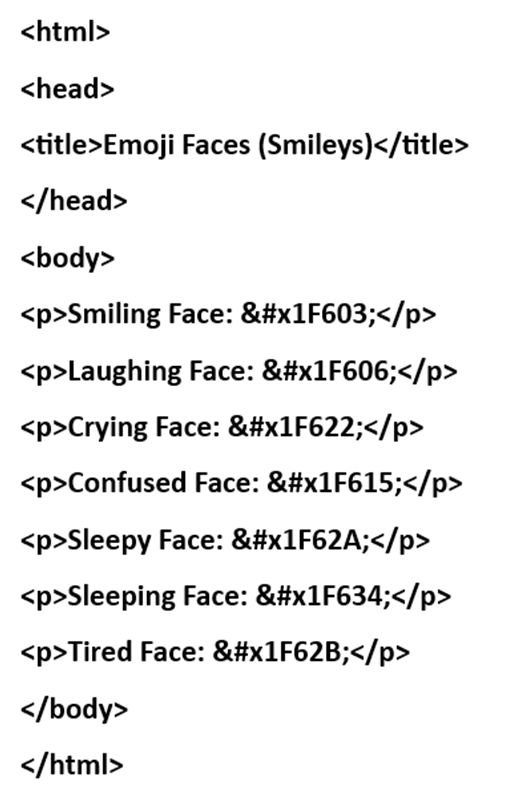
Emoji Faces (Smileys)
Smiling Face: 😃
Laughing Face: 😆
Crying Face: 😢
Confused Face: 😕
Sleepy Face: 😪
Sleeping Face: 😴
Tired Face: 😫
HTML – Audio
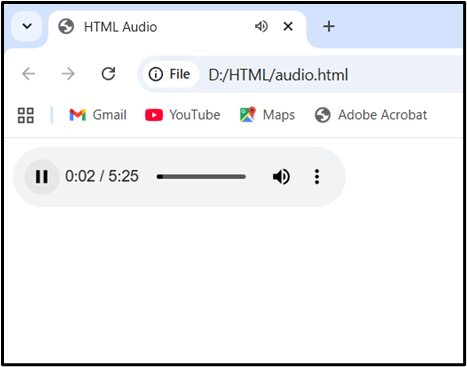
The HTML <audio> tag is used to play an audio file on a web page. The <audio> tag is used to embed sound content in a document, such as music or other audio streams. The controls attribute adds audio controls, like play, pause, and volume.
The <source> tag is used within the <audio> tag to specify the location and format of the audio file. This allows for providing multiple audio sources in different formats, ensuring compatibility across various browsers
The text between the <audio> and </audio> tags will only be displayed in browsers that do not support the <audio> tag.
Example
<!DOCTYPE html>
<html>
<head>
<title>HTML Audio </title>
</head>
<body>
<audio controls>
<source src=”E:\Music\Arijit singh\Sajde (Arijit Singh) 190Kbps.mp3″ type =”audio/mp3″>
</audio>
</body>
</html>
OUTPUT
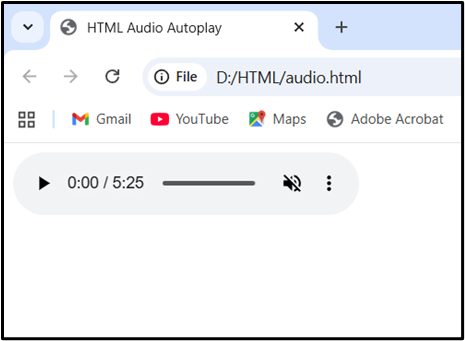
HTML <audio> Autoplay
To start an audio file automatically, use the autoplay attribute. Add muted after autoplay to let audio file start playing automatically (but muted).
Example
<!DOCTYPE html>
<html>
<head>
<title>HTML Audio </title>
</head>
<body>
<audio controls autoplay muted>
<source src=”E:\Music\Arijit singh\Sajde (Arijit Singh) 190Kbps.mp3″ type =”audio/mp3″>
</audio>
</body>
</html>
OUTPUT
HTML – Video
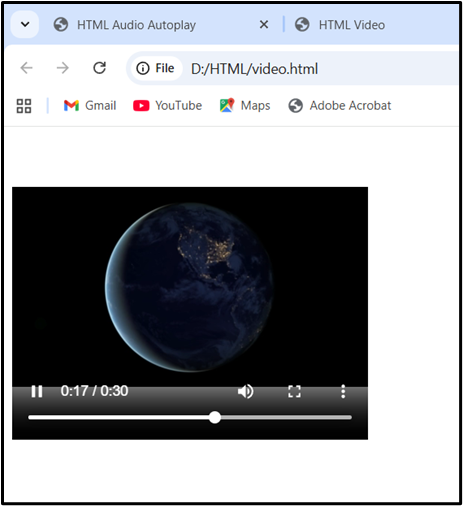
The HTML <video> tag is used to show a video on a web page. The controls attribute adds video controls, like play, pause, and volume. It is a good idea to always include width and height attributes. If height and width are not set, the page might flicker while the video loads. The <video> tag contains one or more <source> tags with different video sources. The browser will choose the first source it supports. The text between the <video> and </video> tag will only be displayed in browsers that do not support the <video> element.
Example
<!DOCTYPE html>
<html>
<head>
<title>HTML Video</title>
</head>
<body>
<video width=”320″ height=”240″ controls>
<source src = “D:\HTML\video.mp4” type = “video/mp4”>
</video>
</body>
</html>
OUTPUT
HTML – TABLES
In HTML, tables make it easy to lay out data, text and even images in a grid. Tables are just like spreadsheets and they are made up of rows and columns. They are very frequently used by almost all web developers to arrange data in a tabular format. Almost all major sites on the web are using invisible tables to layout the pages. The most important layout aspects that can be done with table are:
- Divide the page into different sections.
- Creating menus.
- Adding interactive form fields.
- Easy alignment of images that have been cut into smaller pieces.
- A simple way to allow text to be written in two or more columns next to each other.
In HTML, the <TABLE> tag is used to create a table. A table is divided into rows with the <TR> (Table Row) tag, and each row is divided into data cells with the <TD> (Table data) tag. The <TD> tag holds the content of a data cell. A <TD> tag can contain text, links, images, lists, forms etc.
Table Borders
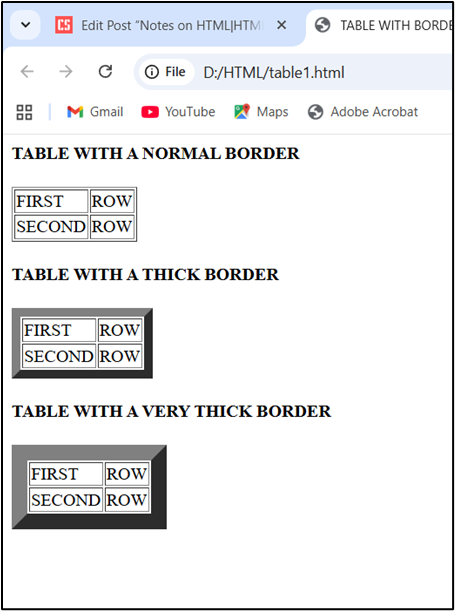
By default, the table does not contain a border. To include a border to the table, specify a BORDER attribute inside the <TABLE> tag. The BORDER attribute of <TABLE> tag controls the appearance of the table’s borders or lines. The default border is 0, so if we do not specify a border attribute, the table is displayed without any borders. Sometimes this is useful, but most of the time, we want the borders to be visible.
Example
<!DOCTYPE html>
<HTML>
<HEAD>
<TITLE> TABLE WITH BORDERS </TITLE>
</HEAD>
<BODY>
<H4> TABLE WITH A NORMAL BORDER </H4>
<TABLE BORDER= “1”>
<TBODY>
<TR>
<TD>FIRST</TD>
<TD>ROW</TD>
</TR>
<TR>
<TD>SECOND</TD>
<TD>ROW</TD>
</TR>
</TBODY>
</TABLE>
<H4> TABLE WITH A THICK BORDER </H4>
<TABLE BORDER= “8”>
<TBODY>
<TR>
<TD>FIRST</TD>
<TD>ROW</TD>
</TR>
<TR>
<TD>SECOND</TD>
<TD>ROW</TD>
</TR>
</TBODY>
</TABLE>
<H4> TABLE WITH A VERY THICK BORDER </H4>
<TABLE BORDER= “15”>
<TBODY>
<TR>
<TD>FIRST</TD>
<TD>ROW</TD>
</TR>
<TR>
<TD>SECOND</TD>
<TD>ROW</TD>
</TR>
</TBODY>
</TABLE>
</BODY>
</HTML>
OUTPUT
HEADING IN A TABLE
Header information in a table is defined with the <TH> tag. All major browsers display the text in the <TH> element as bold and centered. To create heading of the table, first create a row using the <TR> tag and then, use the <TH> tag to define the cells instead of using the <TD> tags.
Example
<!DOCTYPE html>
<HTML>
<HEAD>
<TITLE> HEADINGS IN ATABLE </TITLE>
</HEAD>
<BODY>
<TABLE BORDER= “3”>
<THEAD>
<TR>
<TH>ROLL NO</TH>
<TH>FIRST NAME</TH>
<TH>LAST NAME</TH>
<TH>ADDRESS</TH>
</TR>
</THEAD>
<TBODY>
<TR>
<TD>1</TD>
<TD>BINOY</TD>
<TD>KHEMKA</TD>
<TD>ARUNACHAL</TD>
</TR>
<TR>
<TD>2</TD>
<TD>BIPON</TD>
<TD>DUTTA</TD>
<TD>TINSUKIA</TD>
</TR>
<TR>
<TD>3</TD>
<TD>ARUN</TD>
<TD>SAHA</TD>
<TD>TINSUKIA</TD>
</TR>
</TBODY>
</TABLE>
</BODY>
</HTML>
OUTPUT
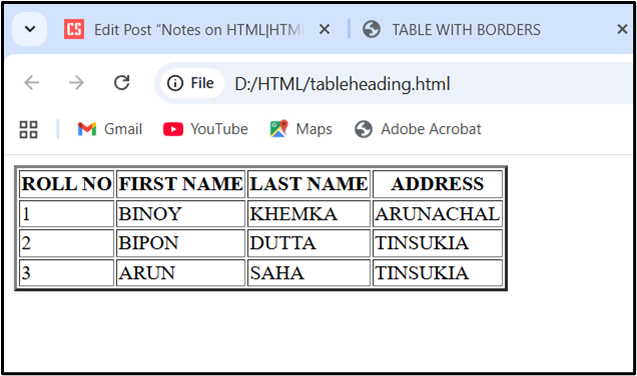
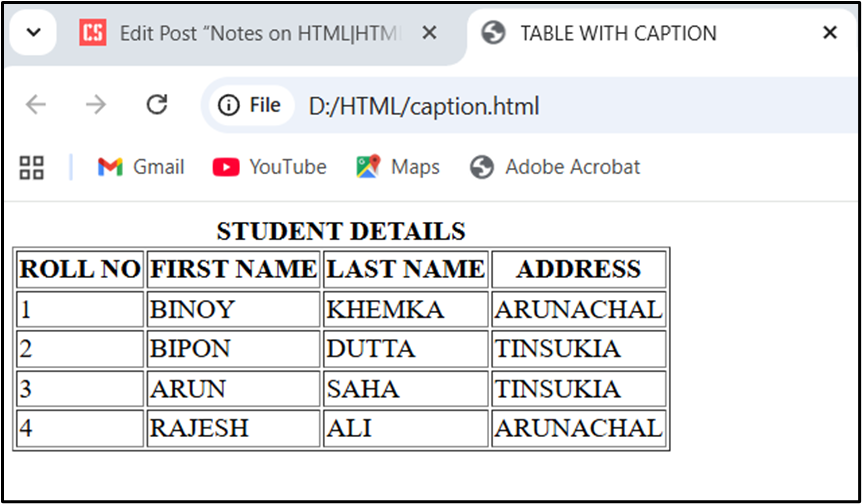
TABLE WITH A CAPTION
It is a good idea to add a title or caption to a table that describes the table data. To add a caption to the table, <CAPTION> tag is used. There could be only one caption per table. The <CAPTION> tag is supported in all major browsers.
Example
<!DOCTYPE html>
<HTML>
<HEAD>
<TITLE> TABLE WITH CAPTION </TITLE>
</HEAD>
<BODY>
<TABLE BORDER= “1”>
<CAPTION><B>STUDENT DETAILS</B></CAPTION>
<THEAD>
<TR>
<TH>ROLL NO</TH>
<TH>FIRST NAME</TH>
<TH>LAST NAME</TH>
<TH>ADDRESS</TH>
</TR>
</THEAD>
<TBODY>
<TR>
<TD>1</TD>
<TD>BINOY</TD>
<TD>KHEMKA</TD>
<TD>ARUNACHAL</TD>
</TR>
<TR>
<TD>2</TD>
<TD>BIPON</TD>
<TD>DUTTA</TD>
<TD>TINSUKIA</TD>
</TR>
<TR>
<TD>3</TD>
<TD>ARUN</TD>
<TD>SAHA</TD>
<TD>TINSUKIA</TD>
</TR>
<TR>
<TD>4</TD>
<TD>RAJESH</TD>
<TD>ALI</TD>
<TD>ARUNACHAL</TD>
</TR>
</TBODY>
</TABLE>
</BODY>
</HTML>
OUTPUT
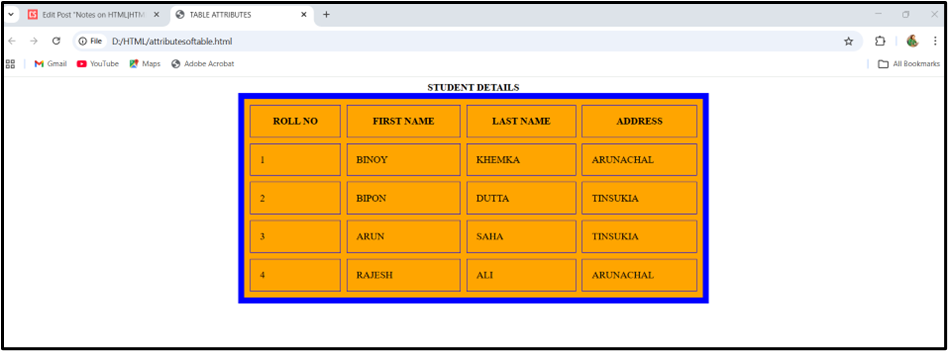
ATTRIBUTES of <TABLE>
| Attribute | Value | Description |
| border | pixels | Specifies the border width. |
| bordercolor | colorname | Specifies the color of the table’s border. |
| align | right, left, center, justify | Specifies the alignment of a table. |
| bgcolor | colorname | Specifies the background color of the table |
| background | URL | Specifies the background image of table |
| height | pixels or % | Specifies the height of the table |
| width | pixels or % | Specifies the width of the table |
| cellspacing | pixels | Specifies the space between cells |
| cellpadding | pixels | Specifies the space within each cell |
Example
<!DOCTYPE html>
<HTML>
<HEAD>
<TITLE> TABLE ATTRIBUTES </TITLE>
</HEAD>
<BODY>
<TABLE BORDER= “10” BORDERCOLOR= “BLUE” ALIGN= “CENTER” BGCOLOR= “ORANGE” HEIGHT= “50%” WIDTH= “50%” CELLSPACING= “10” CELLPADDING=”15″>
<CAPTION><B>STUDENT DETAILS</B></CAPTION>
<THEAD>
<TR>
<TH>ROLL NO</TH>
<TH>FIRST NAME</TH>
<TH>LAST NAME</TH>
<TH>ADDRESS</TH>
</TR>
</THEAD>
<TBODY>
<TR>
<TD>1</TD>
<TD>BINOY</TD>
<TD>KHEMKA</TD>
<TD>ARUNACHAL</TD>
</TR>
<TR>
<TD>2</TD>
<TD>BIPON</TD>
<TD>DUTTA</TD>
<TD>TINSUKIA</TD>
</TR>
<TR>
<TD>3</TD>
<TD>ARUN</TD>
<TD>SAHA</TD>
<TD>TINSUKIA</TD>
</TR>
<TR>
<TD>4</TD>
<TD>RAJESH</TD>
<TD>ALI</TD>
<TD>ARUNACHAL</TD>
</TR>
</TBODY>
</TABLE>
</BODY>
</HTML>
OUTPUT
ATTRIBUTES of <TR>
| Attribute | Value | Description |
| align | right, left, center, justify | Aligns the content in a table row |
| bgcolor | colorname | Specifies a background color of a row |
| valign | top, middle, bottom, baseline | Vertical aligns the content in table row |
ATTRIBUTES of <TH>
| Attribute | Value | Description |
| align | right, left, center, justify | Aligns the content in a header cell |
| bgcolor | colorname | Specifies a background color of a header cell |
| valign | top, middle, bottom, baseline | Vertical aligns the content in header cell |
| height | pixels | Specifies the height of a header cell |
| width | pixels | Specifies the width of a header cell |
| rowspan | number | Specifies the number of rows a header cell should span |
| colspan | number | Specifies the number of columns a header cell should span |
ATTRIBUTES of <TD>
| Attribute | Value | Description |
| align | right, left, center, justify | Aligns the content in a cell |
| bgcolor | colorname | Specifies a background color of a cell |
| valign | top, middle, bottom, baseline | Vertical aligns the content in a cell |
| height | pixels | Specifies the height of a cell |
| width | pixels | Specifies the width of a cell |
| rowspan | number | Specifies the number of rows a cell should span |
| colspan | number | Specifies the number of columns a cell should span |
HTML Table: colspan and rowspan
In HTML tables, colspan and rowspan are used to merge cells.
Difference
| Attribute | Meaning | Direction |
| colspan | Merges columns | Horizontal → |
| rowspan | Merges rows | Vertical ↓ |
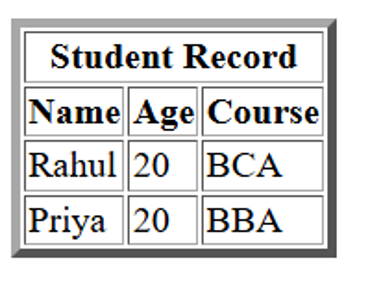
colspan
colspan is used to merge two or more columns horizontally.
Example
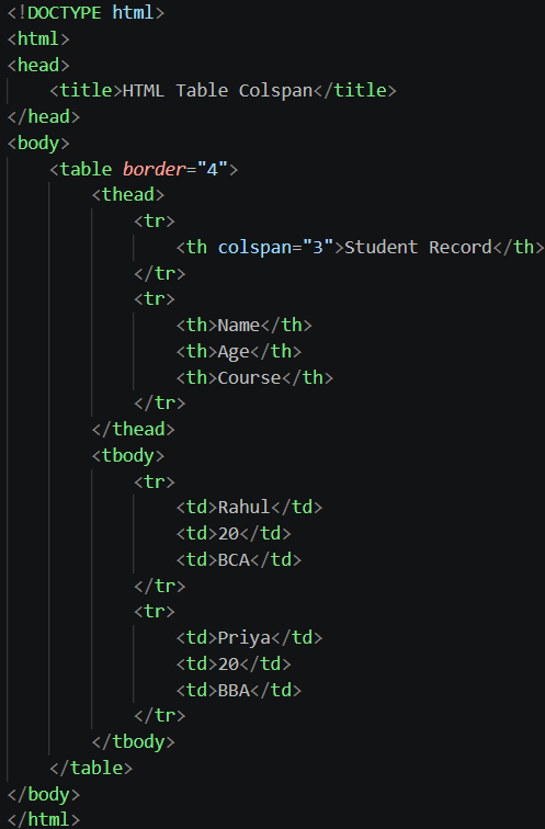
OUTPUT
rowspan
rowspan is used to merge two or more rows vertically.
Example
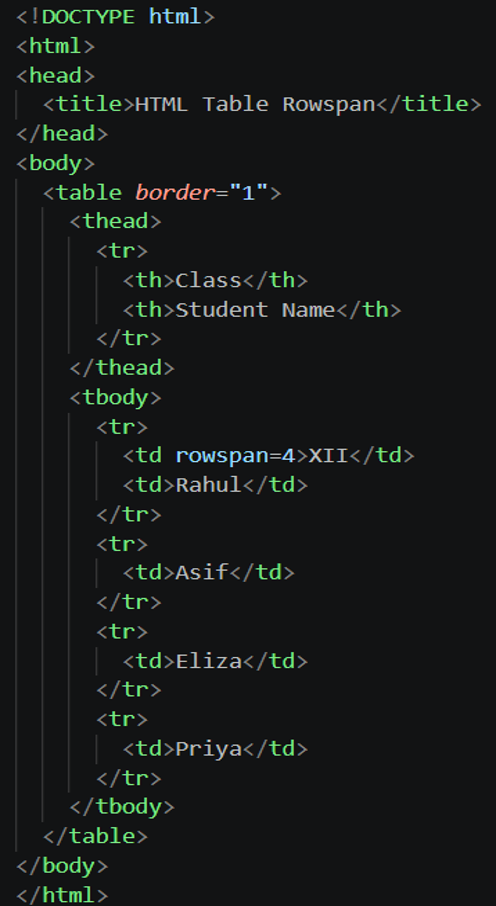
OUTPUT
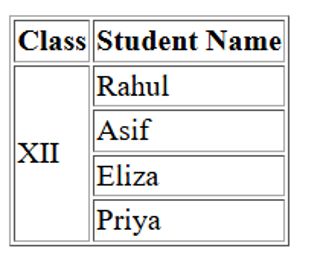
Using both colspan and rowspan
Example
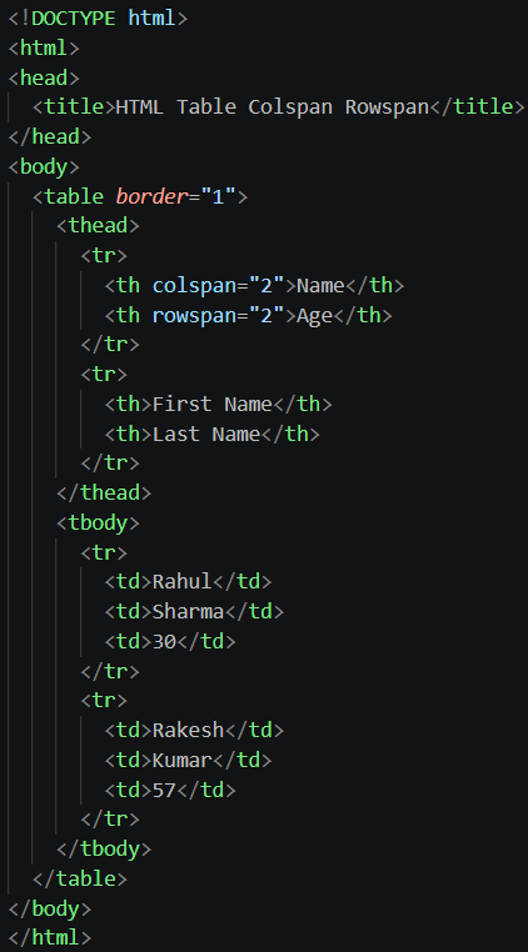
OUTPUT
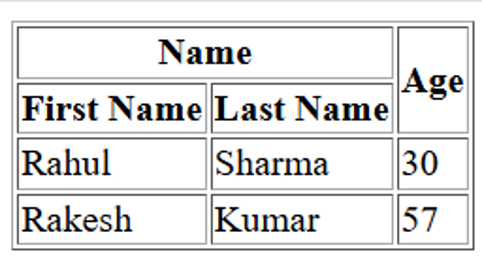
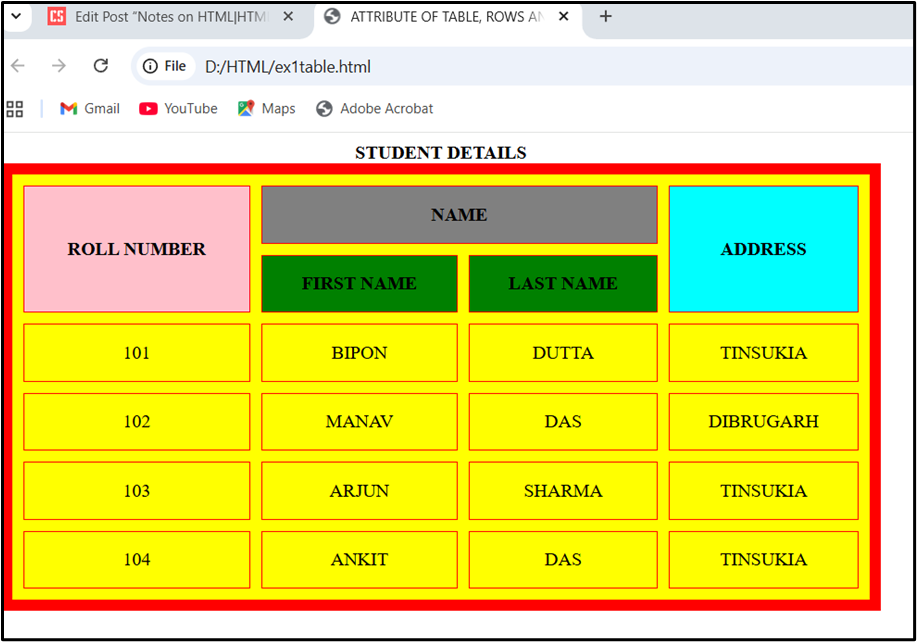
Practice Example – 1
<!DOCTYPE HTML>
<HTML>
<HEAD>
<TITLE>ATTRIBUTE OF TABLE, ROWS AND COLUMNS</TITLE>
</HEAD>
<BODY>
<TABLE BORDER= “10” BORDERCOLOR= “RED” BGCOLOR= “YELLOW” WIDTH= “50%” CELLSPACING= “10” CELLPADDING=”15″>
<CAPTION><B>STUDENT DETAILS</B></CAPTION>
<THEAD>
<TR>
<TH ROWSPAN=”2″ BGCOLOR=”PINK”> ROLL NUMBER</TH>
<TH COLSPAN=”2″ BGCOLOR=”GREY”> NAME</TH>
<TH ROWSPAN=”2″ BGCOLOR= “AQUA”>ADDRESS</TH>
</TR>
<TR BGCOLOR=”GREEN”>
<TH>FIRST NAME</TH>
<TH>LAST NAME</TH>
</TR>
</THEAD>
<TBODY>
<TR ALIGN=”CENTER”>
<TD>101</TD>
<TD>BIPON</TD>
<TD>DUTTA</TD>
<TD>TINSUKIA</TD>
</TR>
<TR ALIGN=”CENTER”>
<TD>102</TD>
<TD>MANAV</TD>
<TD>DAS</TD>
<TD>DIBRUGARH</TD>
</TR>
<TR ALIGN=”CENTER”>
<TD>103</TD>
<TD>ARJUN</TD>
<TD>SHARMA</TD>
<TD>TINSUKIA</TD>
</TR>
<TR ALIGN=”CENTER”>
<TD>104</TD>
<TD>ANKIT</TD>
<TD>DAS</TD>
<TD>TINSUKIA</TD>
</TR>
</TBODY>
</TABLE>
</BODY>
</HTML>
OUTPUT
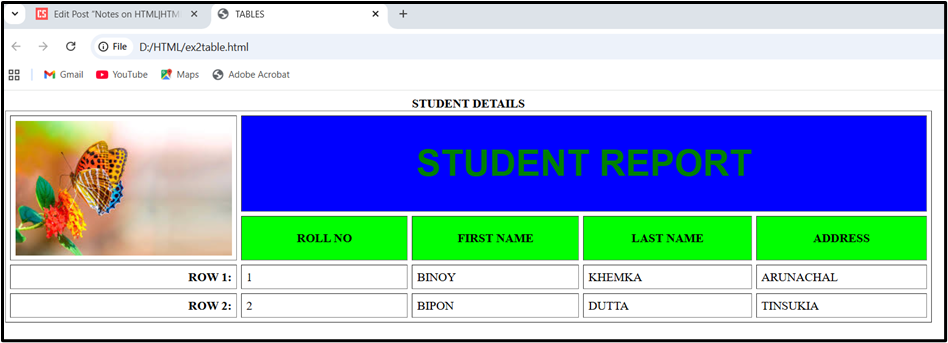
Practice Example – 2
<!DOCTYPE HTML>
<HTML>
<HEAD>
<TITLE>TABLES</TITLE>
</HEAD>
<BODY>
<TABLE BORDER= “1” CELLSPACING= “6” CELLPADDING=“6” WIDTH= “80%” >
<CAPTION><B>STUDENT DETAILS</B></CAPTION>
<THEAD>
<TR>
<TH ROWSPAN=”2”><IMG SRC= “D:\Pictures\butterfly.jpg”> </TH>
<TH COLSPAN= “4” BGCOLOR=”BLUE” ><FONT SIZE= “7” COLOR= “GREEN” FACE= “ARIAL” > STUDENT REPORT </TH>
</TR>
<TR BGCOLOR= “LIME”>
<TH WIDTH= “20 %”> ROLL NO</TH>
<TH WIDTH= “20%” >FIRST NAME </TH>
<TH WIDTH= “20%” > LAST NAME </TH>
<TH WIDTH= “20%” > ADDRESS </TH>
</TR>
</THEAD>
<TBODY>
<TR>
<TH ALIGN= “RIGHT” >ROW 1:</TH>
<TD>1</TD>
<TD>BINOY</TD>
<TD>KHEMKA</TD>
<TD>ARUNACHAL</TD>
</TR>
<TR>
<TH ALIGN= “RIGHT” >ROW 2:</TH>
<TD>2</TD>
<TD>BIPON</TD>
<TD>DUTTA</TD>
<TD>TINSUKIA</TD>
</TR>
</TBODY>
</TABLE>
</BODY>
</HTML>
OUTPUT
HTML – Forms
HTML forms are sections of a webpage designed to collect user input and send it to a server for processing. An HTML form is used to collect information from users, such as names, email addresses, contact number, passwords, feedback, or login details. Forms are created using the <form> element.
A form is an area that can contain form elements. Form elements are like text fields, textarea fields, drop-down menus, radio buttons, checkboxes, etc. which are used to take information from the user. A form is defined with the <FORM> tag. Within the <FORM>…</FORM> tags, all other form related tags and text must appear. The <FORM> tag can contain one more of the following form tags:
- <LABEL>
- <INPUT>
- <SELECT>
- <OPTION>
- <TEXTAREA>
- <BUTTON>
- <FIELDSET>
Important Form Elements
| Element | Purpose |
| <form> | Creates a form |
| <label> | Provides a label for an input |
| <input> | Creates an input field |
| <input type= “text”> | Single-line text field for Text input. |
| <input type= “email”> | Requires the input to match a valid email format (@). |
| <input type= “password”> | Password input. Obscures characters as they are typed for security. |
| <input type= “date”> | Date selection |
| <input type= “radio”> | Allows selection of exactly one option from a grouped set. |
| <input type= “checkbox”> | Allows selection of multiple independent options. |
| <input type= “number”> | Restricts input to numbers; can use min and max attributes. |
| <input type= “tel”> | Phone number |
| <input type= “file”> | Prompts the user to select and upload a file from their device. |
| <textarea> | Allows multi-line text |
| <select> | Creates a drop-down list |
| <option> | Defines an option in a drop-down |
| <button> | Creates a clickable button |
| <input type= “submit”> | Submit form. Generates a button that triggers the form submission. |
| <input type= ”reset”> | Clear form |
Form Attributes
The <form> element relies on specific attributes to control how and where data is submitted. The two most important attributes are:
Syntax
<form action=”#” method=”post”>
action specifies where the form data is sent when the user submits the form.
method specifies how the data is sent to the server when the form is submitted. Method can take one of two possible values: POST or GET.
The POST method is preferred because it causes the form’s content to be passed one element at a time. GET concatenates all the field names and their associated values into one long string.
Example
<form action=”search.php” method=”post”>
<LABEL>
The <label> element is used to associate a text label with a form <input> field. The label is used to tell users the value that should be entered in the associated input field. The <label> tag needs an “for” attribute whose value is the same as the input id.
Important Rule
The value of for must match the input’s id:
<label for=”name”>Name:</label>
<input type=”text” id=”name”>
Example
<!DOCTYPE HTML>
<HTML>
<HEAD>
<TITLE>LABELS IN HTML FORM</TITLE>
</HEAD>
<BODY>
<H2><U>LABELS IN HTML FORM</U></H2>
<P>Which soft drink would you like?
<FORM>
<INPUT TYPE=”radio” ID=”pepsi” NAME=”drink”>
<LABEL FOR=”pepsi”>PEPSI</LABEL><BR>
<INPUT TYPE=”radio” ID=“cocacola” NAME=”drink”>
<LABEL FOR=”cocacola”>COCA COLA</LABEL>
</FORM>
</BODY>
</HTML>
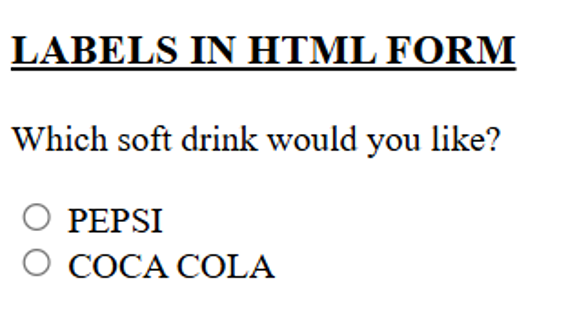
OUTPUT
<INPUT> Tag and Attributes
The most used <FORM> tag is the <INPUT> tag specifies an input field where the user can input or enter data. The type of input is specified with the type attribute. Common <input> types include text, email, password, number, radio, checkbox, date, file, submit, and reset.
Required
Required attribute makes the field compulsory. To make a field mandatory in an HTML form, we use the required attribute. The required attribute prevents normal form submission until the field is filled in.
The required attribute is highly versatile and works natively across multiple form control types such as Text area, drop-down list, checkboxes, radio buttons etc.
Example
<input type=”text” name=”username” required>
<input type=”email” name=”email” required>
<input type=”number” name=”age” min=”18″ max=”100″>
Radio Buttons
An HTML radio button is created using the <input type=”radio”> element. It allows a user to select exactly one option from a predefined set of mutually exclusive choices.Radio buttons with the same name allow the user to select one option. If the names are different, the browser treats them as unrelated, allowing the user to select multiple options at once.
To make a radio button group mandatory, we technically only need to add the required attribute to one of the radio buttons in the same-named group. However, to make our code cleaner and easier to maintain, it is highly recommended to add it to all of them.
Example
<label>Gender:</label>
<input type=”radio” id=”male” name=”gender” value=”male”>
<label for=”male”>Male</label>
<input type=”radio” id=”female” name=”gender” value=”female”>
<label for=”female”>Female</label>
Checkboxes
In HTML, checkboxes are created using the <input type=”checkbox”> element. Unlike radio buttons, which limit users to one selection per group,
checkboxes allow users to select zero, one, or multiple options simultaneously from a given list.
Example
<p>Select your hobbies:</p>
<input type=”checkbox” id=”reading” name=”hobby” value=”reading”>
<label for=”reading”>Reading</label>
<input type=”checkbox” id=”sports” name=”hobby” value=”sports”>
<label for=”sports”>Sports</label>
Drop-Down List
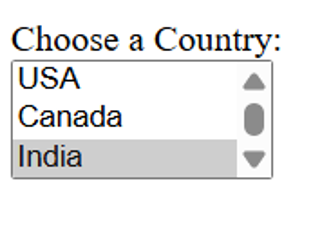
A drop-down list in HTML is created using the <select> tag along with nested <option> tags. It allows users to select one or multiple options from a predefined list.
Key Attributes
<select>: The main container tag that initiates the drop-down interface.
- name: Identifies the field name when sending form data to a server.
- id: Connects the drop-down directly to a <label> for accessibility and allows target styling or script manipulation.
- size: The size attribute specifies how many options are visible at once.
Multiple:Themultipleattributes allow the user to select more than one option.- Required: To make a drop-down list mandatory, we need to add the required attribute directly to the <select> tag.
Attributes of <option>
value: Defines the value sent when the option is selected. This is important for form submission.
selected: Pre-selects the option when the page loads.
Example – 1
<!DOCTYPE HTML>
<HTML>
<HEAD>
<TITLE>DROP-DOWN LIST IN HTML FORM</TITLE>
</HEAD>
<BODY>
<H3><U> DROP-DOWN LIST IN HTML FORM</U></H3><BR><BR>
<FORM>
<LABEL FOR=”CARS”>CHOOSE A CAR:</LABEL>
<SELECT NAME=”CARS” ID=”CARS” REQUIRED>
<OPTION VALUE=”VOLVO”>VOLVO </OPTION>
<OPTION VALUE=”SAAB”>SAAB </OPTION>
<OPTION VALUE=”MERCEDES”> MERCEDES</OPTION>
<OPTION VALUE=”FIAT”>FIAT </OPTION>
<OPTION VALUE=”AUDI”>AUDI </OPTION>
</SELECT>
</FORM>
</BODY>
</HTML>
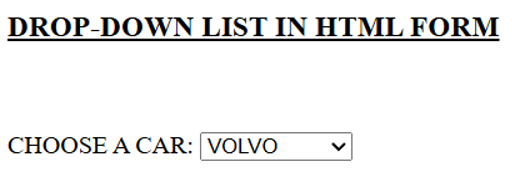
OUTPUT
Example – 2
<!DOCTYPE HTML>
<HTML>
<HEAD>
<TITLE> DROP DOWN LIST </TITLE>
</HEAD>
<BODY>
<FORM>
<LABEL FOR=”COUNTRY”>CHOOSE A COUNTRY:</LABEL><BR>
<SELECT ID=”COUNTRY” NAME=”COUNTRY” SIZE=”3″ MULTIPLE>
<OPTION VALUE=”USA”>USA </OPTION>
<OPTION VALUE=”CANADA”> CANADA</OPTION>
<OPTION VALUE=”INDIA” SELECTED> INDIA</OPTION>
<OPTION VALUE=”UK”>UNITED KINGDOM</OPTION>
</SELECT>
</FORM>
</BODY>
</HTML>
OUTPUT
<TEXTAREA>Tag and Attribute
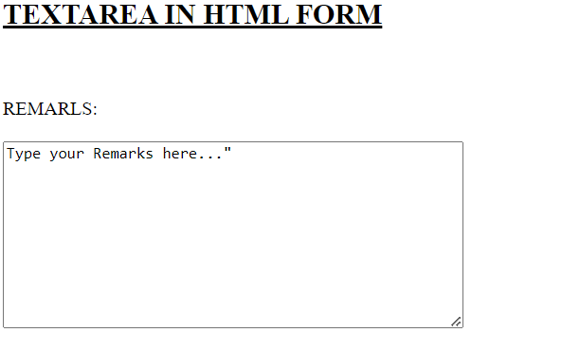
The <textarea> tag in HTML is used to create a multi-line text input field. It allows users to enter longer blocks of text, such as comments, descriptions, feedback, or messages, where a single-line input field would not be suitable.
Attributes of <textarea>
name: The name of the textarea, which is useful when the form is submitted (the content will be sent under this name).
rows: Specifies the number of visible text lines in the text area (i.e., its height).
cols: Specifies the visible width of the text area in terms of the number of characters.
maxlength: Limits the maximum number of characters the user can input.
required: The required attribute tells the browser to block form submission until that field is filled out. It prevents normal form submission until the field is filled in.
Example
<!DOCTYPE HTML>
<HTML>
<HEAD>
<TITLE>TEXTAREA IN HTML FORM </TITLE>
</HEAD>
<BODY>
<H2><U> TEXTAREA IN HTML FORM</U></H2><BR><BR>
<FORM>
<LABEL FOR=”REMARKS”>REMARKS:</LABEL><BR><BR>
<TEXTAREA NAME=”REMARKS” ROWS=”10″ COLS=”50″ MAXLENGTH =”200″>
Type your Remarks here…”
</TEXTAREA>
</FORM>
</BODY>
</HTML>
OUTPUT
<BUTTON>Tag and Attribute
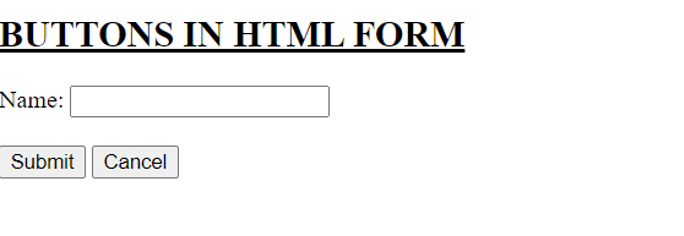
The <button> tag in HTML is used to create clickable buttons.
Example
<!DOCTYPE HTML>
<HTML>
<HEAD>
<TITLE>BUTTONS IN HTML FORM </TITLE>
</HEAD>
<BODY>
<H2><U>BUTTONS IN HTML FORM</U></H2>
<FORM>
<LABEL FOR=”NAME”>Name:</LABEL>
<INPUT TYPE=”TEXT” ID=”NAME” NAME=”NAME”><BR><BR>
<BUTTON TYPE=”SUBMIT”>Submit </BUTTON>
<BUTTON TYPE=”RESET”>Cancel </BUTTON>
</FORM>
</BODY>
</HTML>
OUTPUT
<fieldset> & <legend>
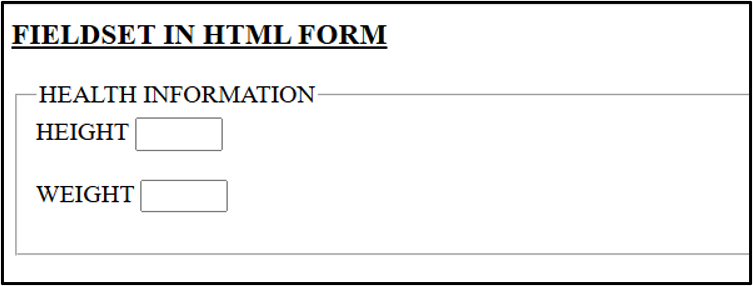
The <fieldset> and <legend> tag groups related elements together visually within a box and assigns a caption to that group.
The <fieldset> tag in HTML is used to group related elements within a form. It helps to organize form content by visually grouping related inputs and labels together, typically with a border around them. The <fieldset> tag is often used with the <legend> tag to provide a caption for the group of form elements.
Example
<!DOCTYPE HTML>
<HTML>
<HEAD>
<TITLE>FIELDSET IN HTML FORM</TITLE>
</HEAD>
<BODY>
<H3><U>FIELDSET IN HTML FORM</U></H3>
<FIELDSET>
<LEGEND>HEALTH INFORMATION </LEGEND>
<FORM>
<LABEL FOR=”HEIGHT”>HEIGHT </LABEL>
<INPUT TYPE=”TEXT” ID=”HEIGHT” NAME=”HEIGHT” SIZE= “3”><BR><BR>
<LABEL FOR=”WEIGHT”>WEIGHT </LABEL>
<INPUT TYPE =”TEXT” ID=”WEIGHT” NAME=”WEIGHT” SIZE= “3”>
</FORM>
</FIELDSET>
</BODY>
</HTML>
OUTPUT
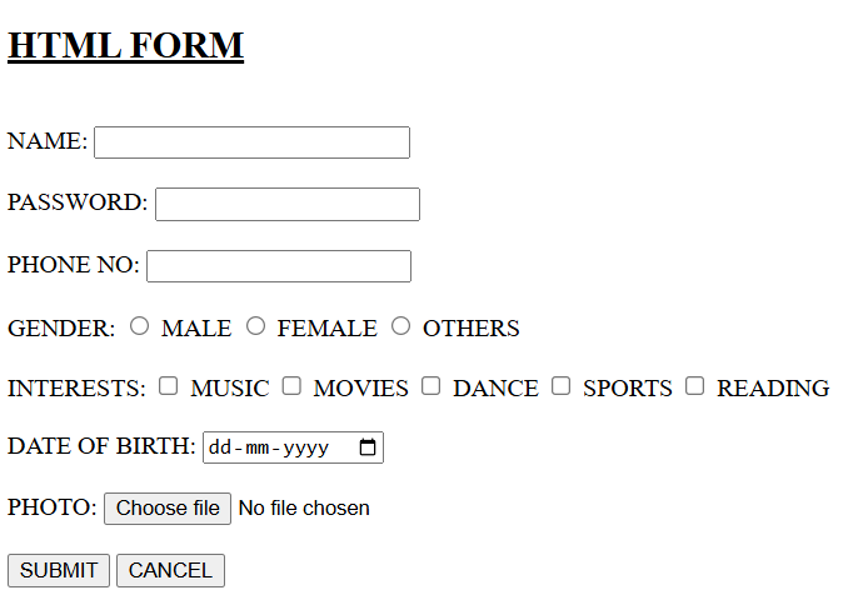
Practice Example -1
<!DOCTYPE HTML>
<HTML>
<HEAD>
<TITLE> HTML FORM</TITLE>
</HEAD>
<BODY>
<H2><U>HTML FORM</U></H2><BR>
<FORM>
<LABEL FOR=”NAME”>NAME:</LABEL>
<INPUT TYPE=”TEXT” ID=”NAME” NAME=”NAME” SIZE=”25″ MAXLENGTH=”20″><BR><BR>
<LABEL FOR=”PASSWORD”>PASSWORD:</LABEL>
<INPUT TYPE=”PASSWORD” ID=”PASSWORD” NAME=”PASSWORD” SIZE=”20″ MAXLENGTH=”8″><BR><BR>
<LABEL FOR= “PHONE”>PHONE NO:</LABEL>
<INPUT TYPE=”TEL” ID=”PHONE” NAME=”PHONE”><BR><BR>
<LABEL>GENDER:</LABEL>
<INPUT TYPE=”RADIO” ID=”MALE” NAME=”GENDER” VALUE=”MALE”>
<LABEL FOR=”MALE”>MALE</LABEL>
<INPUT TYPE=”RADIO” ID=”FEMALE” NAME=”GENDER” VALUE=”FEMALE”>
<LABEL FOR=”FEMALE”>FEMALE </LABEL>
<INPUT TYPE=”RADIO” ID=”OTHERS” NAME=”GENDER” VALUE=”OTHERS”>
<LABEL FOR=”OTHERS”>OTHERS </LABEL><BR><BR>
<LABEL>INTERESTS:</LABEL>
<INPUT TYPE=”CHECKBOX” ID=”MUSIC” NAME=”INTEREST” VALUE=”MUSIC”>
<LABEL FOR=”MUSIC”>MUSIC</LABEL>
<INPUT TYPE=”CHECKBOX” ID=”MOVIES” NAME=”INTEREST” VALUE=”MOVIES”>
<LABEL FOR=”MOVIES”>MOVIES </LABEL>
<INPUT TYPE=”CHECKBOX” ID=”DANCE” NAME=”INTEREST” VALUE=”DANCE”>
<LABEL FOR=”DANCE”>DANCE</LABEL>
<INPUT TYPE=”CHECKBOX” ID=”SPORTS” NAME=”INTEREST” VALUE=”SPORTS”>
<LABEL FOR=”SPORTS”>SPORTS </LABEL>
<INPUT TYPE=”CHECKBOX” ID=”READING” NAME=”INTEREST” VALUE=”READING”>
<LABEL FOR=”READING”>READING </LABEL><BR><BR>
<LABEL FOR=”DOB”>DATE OF BIRTH:</LABEL>
<INPUT TYPE=”DATE” ID=”DOB” NAME=”DOB”><BR><BR>
<LABEL FOR=”PHOTO”>PHOTO:</LABEL>
<INPUT TYPE=”FILE” ID=”PHOTO” NAME=”MYFILE”><BR><BR>
<INPUT TYPE=”SUBMIT” VALUE =”SUBMIT”>
<INPUT TYPE=”RESET” VALUE =”CANCEL”>
</FORM>
</BODY>
</HTML>
OUTPUT
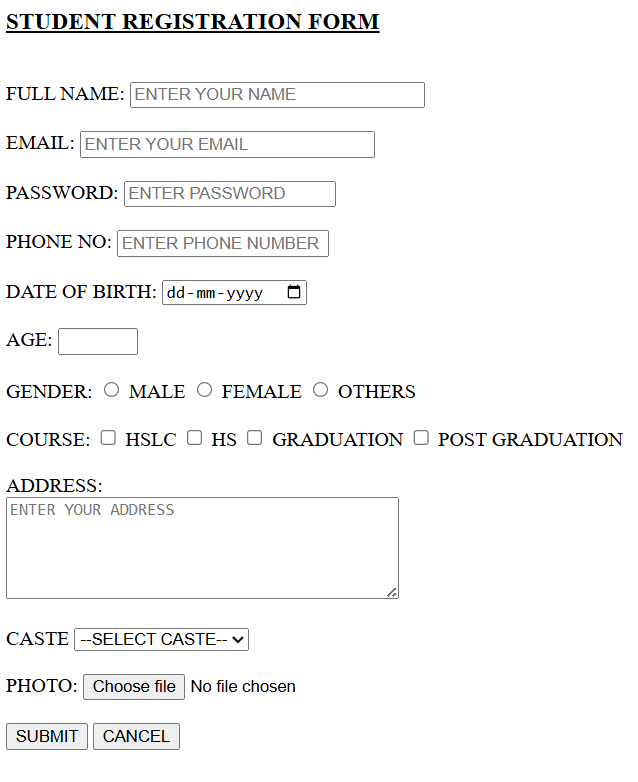
Practice Example – 2
<!DOCTYPE HTML>
<HTML>
<HEAD>
<TITLE>HTML FORM</TITLE>
</HEAD>
<BODY>
<H3><U>STUDENT REGISTRATION FORM</U></H3><BR><BR>
<FORM>
<LABEL FOR=”NAME”>FULL NAME:</LABEL>
<INPUT TYPE=”TEXT” ID=”NAME” NAME=”NAME” SIZE=”30″ MAXLENGTH=”25″ PLACEHOLDER=”ENTER YOUR NAME” REQUIRED><BR><BR>
<LABEL FOR=”EMAIL”>EMAIL:</LABEL>
<INPUT TYPE=”EMAIL” ID=”EMAIL” NAME=”EMAIL” SIZE=”30″ MAXLENGTH=”25″ PLACEHOLDER=”ENTER YOUR EMAIL” REQUIRED><BR><BR>
<LABEL FOR=”PASSWORD”>PASSWORD:</LABEL>
<INPUT TYPE=”PASSWORD” ID=”PASSWORD” NAME=”PASSWORD” SIZE=”20″ MAXLENGTH=”8″ PLACEHOLDER=”ENTER PASSWORD” REQUIRED><BR><BR>
<LABEL FOR=”PHONE”>PHONE NO:</LABEL>
<INPUT TYPE=”TEL” ID=”PHONE” NAME=”PHONE” PLACEHOLDER =”ENTER PHONE NUMBER”><BR><BR>
<LABEL FOR=”DOB”>DATE OF BIRTH:</LABEL>
<INPUT TYPE=”DATE” ID=”DOB” NAME=”DOB”><BR><BR>
<LABEL FOR=”AGE”>AGE:</LABEL>
<INPUT TYPE=”NUMBER” ID=”AGE” NAME=”AGE” MIN=”18″ MAX=”60″><BR><BR>
<LABEL>GENDER:</LABEL>
<INPUT TYPE=”RADIO” ID=”MALE” NAME=”GENDER” VALUE=”MALE”>
<LABEL FOR=”MALE”>MALE</LABEL>
<INPUT TYPE=”RADIO” ID=”FEMALE” NAME=”GENDER” VALUE=”FEMALE”>
<LABEL FOR=”FEMALE”>FEMALE </LABEL>
<INPUT TYPE=”RADIO” ID=”OTHERS” NAME=”GENDER” VALUE=”OTHERS”>
<LABEL FOR=”OTHERS”>OTHERS </LABEL><BR><BR>
<LABEL>COURSE:</LABEL>
<INPUT TYPE=”CHECKBOX” ID=”HSLC” NAME=”COURSE” VALUE=”HSLC”>
<LABEL FOR=”HSLC”>HSLC</LABEL>
<INPUT TYPE=”CHECKBOX” ID=”HS” NAME=”COURSE” VALUE=”HS”>
<LABEL FOR=”HS”>HS</LABEL>
<INPUT TYPE=”CHECKBOX” ID=”GRADUATE” NAME=”COURSE” VALUE=”GRADUATION”>
<LABEL FOR=”GRADUATE”> GRADUATION</LABEL>
<INPUT TYPE=”CHECKBOX” ID=”PGRADUATE” NAME=”COURSE” VALUE=”POST GRADUATION”>
<LABEL FOR=”PGRADUATE”>POST GRADUATION</LABEL><BR><BR>
<LABEL FOR=”ADDRESS”>ADDRESS:</LABEL><BR>
<TEXTAREA ID=”ADDRESS” NAME=”ADDRESS” ROWS=”5″ COLS=”40″ PLACEHOLDER=”ENTER YOUR ADDRESS”></TEXTAREA><BR><BR>
<LABEL FOR=”CASTE”>CASTE</LABEL>
<SELECT ID=”CASTE” NAME=”CASTE”>
<OPTION VALUE=””>–SELECT CASTE–</OPTION>
<OPTION VALUE=”GENERAL”> GENERAL</OPTION>
<OPTION VALUE=”OBC”>OBC </OPTION>
<OPTION VALUE=”MOBC”>MOBC </OPTION>
<OPTION VALUE=”SC”>SC</OPTION>
<OPTION VALUE=”ST(P)”>ST(P)</OPTION>
<OPTION VALUE=”ST(H)”>ST(H)</OPTION>
</SELECT><BR><BR>
<LABEL FOR=”PHOTO”>PHOTO:</LABEL>
<INPUT TYPE=”FILE” ID=”PHOTO” NAME=”MYFILE”><BR><BR>
<INPUT TYPE=”SUBMIT” VALUE =”SUBMIT”>
<INPUT TYPE=”RESET” VALUE =”CANCEL”>
</FORM>
</BODY>
</HTML>
OUTPUT
Practice Example – 3
<!DOCTYPE HTML>
<HTML>
<HEAD>
<TITLE>APPLICATION FORM</TITLE>
</HEAD>
<BODY>
<TABLE BORDER=”3″ ALIGN=”CENTER”>
<TR>
<TD>
<CENTER>
<H2>DIBRUGARH UNIVERSITY</H2>
<H3>DEPARTMENT OF COMPUTER SCIENCE</H3>
<H4>APPLICATION FOR ADMISSION IN PGDCA</H4>
</CENTER>
<FORM>
1.<LABEL FOR=”NAME”>Name of the Applicant</LABEL> 
<INPUT TYPE=”TEXT” ID=”NAME” NAME=”NAME” SIZE=”20″ MAXLENGTH=”25″><BR><BR>
2. <LABEL FOR=”ADDRESS”> Address</LABEL> 
<INPUT TYPE=”TEXT” ID=”ADDRESS” NAME=”ADDRESS” SIZE=”35″ MAXLENGTH=”25″><BR><BR>
3. <LABEL>Gender</LABEL> 
<INPUT TYPE=”RADIO” ID=”MALE” NAME=”GENDER” VALUE=”M”> 
<LABEL FOR=”MALE”>Male</LABEL>  
<INPUT TYPE=”RADIO” ID=”FEMALE” NAME=”GENDER” VALUE=”F”>
<LABEL FOR=”FEMALE”>Female </LABEL> 
<INPUT TYPE=”RADIO” ID=”OTHERS” NAME=”GENDER” VALUE=”O”>
<LABEL FOR=”OTHERS”>Others </LABEL><BR><BR>
4.<LABEL>Employed</LABEL> 
<INPUT TYPE=”CHECKBOX” ID=”EMPLOYED” NAME=”EMPLOYED” VALUE=”Y”> 
<LABEL FOR=”EMPLOYED”>YES </LABEL>
<INPUT TYPE=”CHECKBOX” ID=”EMPLOYED” NAME=”EMPLOYED” VALUE=”N”>
<LABEL FOR=”EMPLOYED”>NO </LABEL><BR><BR>
5.<LABEL FOR=”BANK”>Bank Name</LABEL><BR>
<SELECT ID=”BANK” NAME=”BANK” SIZE=”4″>
<OPTION VALUE=”BOB”>Bank of Baroda</OPTION>
<OPTION VALUE=”CB”>Canara Bank</OPTION>
<OPTION VALUE=”CAB”>Corporation Bank</OPTION>
<OPTION VALUE=”SB”>Syndicate Bank</OPTION>
<OPTION VALUE=”SBI”>State Bank of India</OPTION>
<OPTION VALUE=”UB”>Union Bank</OPTION>
</SELECT><BR><BR>
6.<LABEL FOR=”REMARKS”> Remarks</LABEL><BR>
<TEXTAREA ID=”REMARKS” NAME=”REMARKS” ROWS=”5″ COLS=”50″> This student requests for extra computer time on Saturdays. </TEXTAREA><BR><BR>
<INPUT TYPE=”SUBMIT” VALUE= “Register Now”>
<INPUT TYPE=”RESET” VALUE=”Cancel Data”>
</TD>
</TR>
</TABLE>
</FORM>
</BODY>
</HTML
OUTPUT
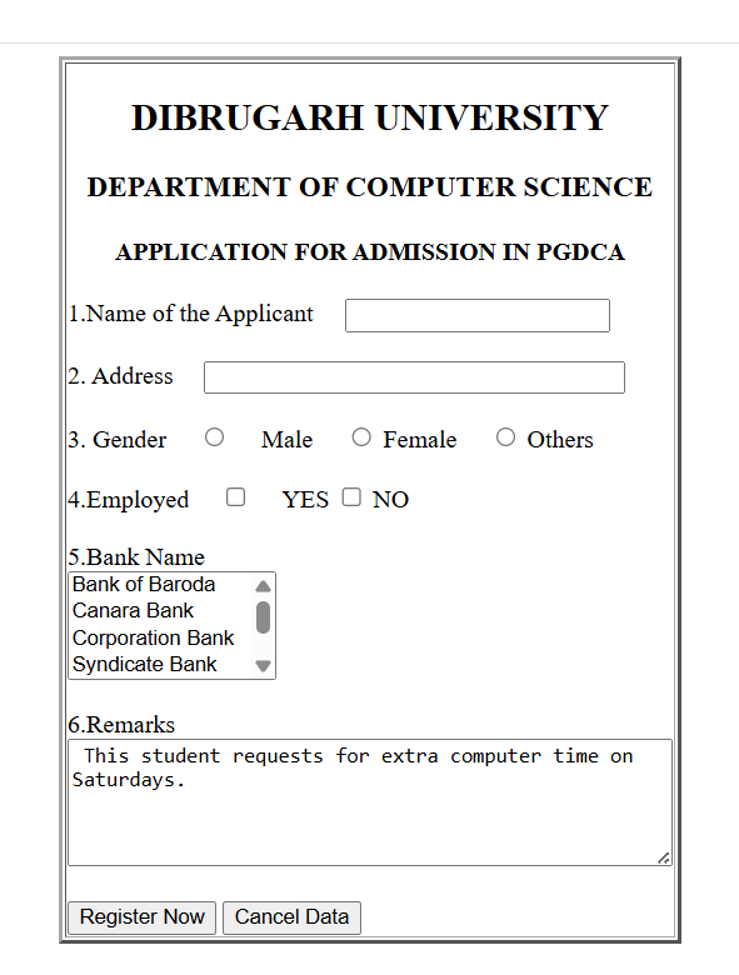
HTML – Hidden Fields
Hidden fields store data in a form that is not displayed to the user but is submitted to the server. The hidden field in HTML is created using the <input type=”hidden”> element. It allows a web form to send data to the server without displaying that field to the user. A hidden field lets web developers include data that cannot be seen or modified by users when a form is submitted.
Syntax
<input type=”hidden” name=”user_id” value=”101″>
Example
<form action=”process.php” method=”post”>
<input type=”text” name=”name” placeholder=”Enter your name”>
<input type=”hidden” name=”student_id” value=”101″>
<input type=”submit” value=”Submit”>
</form>
Here, student_id is not visible on the webpage, but its value (101) is sent to process.php when the form is submitted.
Uses of Hidden Fields
1. Passing IDs
<input type=”hidden” name=”student_id” value=”101″>
Used to send a student/product/user ID.
2. Maintaining information between pages
Data can be carried from one form/page to another.
3. Sending form-related information
Useful for values that the server needs but the user doesn’t need to enter.
4. Editing records
For example, when updating a student record, the hidden field can contain the student’s database ID.
HTML – Frames
HTML allows us to divide a single browser window into several pieces or panes, called frames. Each frame can contain a separate HTML document. So, frames allow us to display more than one HTML document in the same browser window simultaneously. Each frame is independent of the others. A collection of frames in the browser window is known as a FRAMESET.
To create a frameset document, first we need the <FRAMESET>tag. The <FRAMESET> tag defines how to divide the window into frames. Each frameset defines a set of rows or columns. The values of the rows/columns indicate the amount of screen area each row/column will occupy. Each frame is then represented by a <FRAME>tag. The <FRAME> tag defines which HTML document will open in each frame. Frames can be scrolled and resized by the user, unless scrolling and resizing is turned off.
<FRAMESET> Attributes
| Attribute | Value | Description |
| cols | pixels or % | Specifies the number of columns and their width (sizes) |
| rows | pixels or % | Specifies the number of rows and their height (sizes) |
| border | pixels | Set the width of the borders. default width is 5 pixels |
| bordercolor | colorname | Specify the color of borders |
| frameborder | 0 or 1 | Specifies whether or not the frame should have a border |
<FRAME> Attributes
| Attribute | Value | Description |
| frameborder | 0 or 1 | Specifies whether or not to display border around the frame |
| src | URL | Specifies the URL or location of the document to show in a frame |
| name | framename | Specifies the name of the frame |
| noresize | noresize | Specifies that a frame is not resizable. |
| scrolling | yes/no/ auto | Specifies whether or not to display scrollbars in a frame. · yes specifies that scollbars are to be aadded always · no specifies that no scrollbars will be provided · auto specifies that the scrollbar will be added as and when required |
| marginheight | pixels | Specifies the top and bottom margin of a frame |
| marginwidth | pixels | Specifies the left and right margin of a frame |
Example to Create 2 Row Frames
<!DOCTYPE html>
<HTML>
<HEAD>
<TITLE> TWO ROW FRAMES IN HTML</TITLE>
</HEAD>
<FRAMESET ROWS= “40%, 60%”>
<FRAME NAME= “F1” SRC= “D:\HTML\address.html” MARGINHEIGHT= “30” MARGINWIDTH= “50” SCROLLING= “YES” NORESIZE>
<FRAME NAME= “F2” SRC= “D:\HTML\calender.html” MARGINHEIGHT= “30” MARGINWIDTH= “50” SCROLLING= “NO” NORESIZE>
</FRAMESET>
</HTML>
Example to Create 2 Columns Frames
<!DOCTYPE html>
<HTML>
<HEAD>
<TITLE> TWO COLUMNS FRAMES IN HTML</TITLE>
</HEAD>
<FRAMESET COLS= “40%, 60%”>
<FRAME NAME= “F1” SRC= “D:\HTML\address.html” MARGINHEIGHT= “30” MARGINWIDTH= “50” SCROLLING= “YES” NORESIZE>
<FRAME NAME= “F2” SRC= “D:\HTML\calender.html” MARGINHEIGHT= “30” MARGINWIDTH= “50” SCROLLING= “YES”>
</FRAMESET>
</HTML>
NESTED FRAMES
Example
<!DOCTYPE html>
<HTML>
<HEAD>
<TITLE> CREATING ROW AND COLUMN FRAMES</TITLE>
</HEAD>
<FRAMESET ROWS= “35%, 65%”>
<FRAME NAME= “F1” SRC= “D:\HTML\address.html” MARGINHEIGHT= “30” MARGINWIDTH= “50” SCROLLING= “YES” NORESIZE>
<FRAMESET COLS= “25%, 75%”>
<FRAME NAME= “F2” SRC= “D:\HTML\calender.html” MARGINHEIGHT= “30” MARGINWIDTH= “50” SCROLLING= “YES” NORESIZE>
<FRAME NAME= “F3” SRC= “D:\HTML\courses.HTML” MARGINHEIGHT= “30” MARGINWIDTH= “50” SCROLLING= “YES” NORESIZE>
</FRAMESET>
</FRAMESET>
</HTML>
OUTPUT
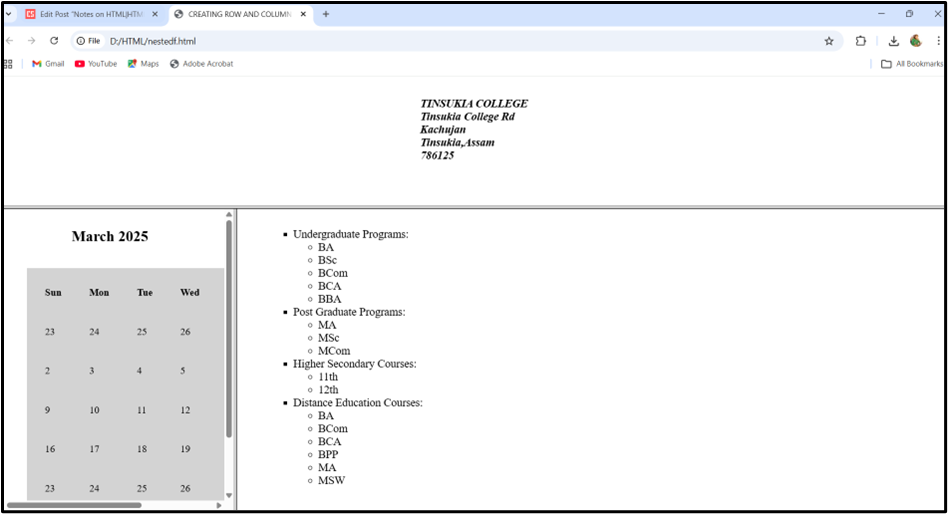
INLINE FRAMES
Inline Frames in HTML, defined by the <iframe> tag, allow us to embed another HTML document within the current page, creating a separate browsing context. This is commonly used for integrating third-party content like YouTube videos, Google Maps, or advertisements into a website.
Key Attributes
Several attributes can be used to control the appearance and behavior of the iframe:
Src: Specifies frame documents URL.
Width and Height: Define the dimensions of the iframe in pixels (default) or percentages.
Frameborder: Turns the border of a frame OFF or ON (0 for off, 1 for on (default)).
Marginheight and Marginwidth: Sets the amount of left, right, top and bottom margin spaces.
Scrolling: Controls the appearance of scrollbars within the frame. NO turns off the scrollbar display even if the document extends beyond the dimension of the frame. The default scrolling attribute value is “auto” which will automatically cause scrollbars to be added to a frame if required.
Example
<!DOCTYPE HTML>
<HTML>
<HEAD>
<TITLE>Tinsukia College</TITLE>
</HEAD>
<BODY>
<H1 ALIGN=”CENTER”>TINSUKIA COLLEGE</H1>
<FONT SIZE=”4″>
<P ALIGN=”JUSTIFY”>Tinsukia College, established in 1956, is one of the oldest undergraduate, coeducational college situated in Tinsukia, Assam. This college is affiliated with the Dibrugarh University. Tinsukia College, an institution that initiated its academic endeavour with a handful of students and four faculty members now has grown into a huge family with an enrolment of more than 3500 students and a teaching fraternity with almost 80 members contributing to the growth of this premier institution of higher education. This Co-ed institution has been imparting education both at Higher Secondary & Degree levels in 5 faculties of Arts, Science, Commerce, Management and Computer Science. Currently, the college has altogether 17 departments, viz. Assamese, Bengali, Botany, Chemistry, Commerce, Computer Science, Economics, English, Geography, Hindi, History, Mathematics, Philosophy, Physics, Political Science, Statistics and Zoology. Except Bengali and Computer Science all the other departments offer Honours courses at the degree level. Besides, it provides two professional degree courses, viz, BBA and BCA. The college has a study centre of Krishna Kanta Handique State Open University under which several UG and PG courses are offered.</P></FONT><BR><BR>
<IFRAME SRC= “D:\HTML\BLOCKQUOTE.html” HEIGHT=”400″ WIDTH=”500″ FRAMEBORDER=”1″ MARGINHEIGHT=”30″ MARGINWIDTH=”30″ SCROLLING=”AUTO”></IFRAME>
<IFRAME SRC=”D:\HTML\college.html” HEIGHT=”400″ WIDTH=”500″ FRAMEBORDER=”1″ MARGINHEIGHT=”30″ MARGINWIDTH=”30″ SCROLLING=”AUTO” ALIGN=”RIGHT”></IFRAME>
</BODY>
</HTML>
OUTPUT